Friday, October 26, 2012

Something WICKED This Way Comes

 
Hello friends! Thank you for visiting me today.

I'm happy to be a part of day five of the Wicked blog hop, brought to you by Mdm Samm & Wendy.
 
I had a few more blocks planned but as the saying goes "the best laid plans...."
Here is my scrappy hexagon spider web.
 

I got carried away an lost track of measurements, ended up being about 14". Oops!

I found a scaredy cat image I liked and appliqued it to the web. Though now I think a spider would have made more sense. This has since been made into a pillow cover. I don't really decorate for Halloween so I'm not sure exactly what I'll do with it. Maybe send it away to a friend? ;)

Now go visit the other fabulous blogs on the hop schedule today, I know I will be!
 
Frightful Friday,
October 26th
Searching Out Simple (you are here)

Sunday, September 9, 2012

Just Three: September

traceyjay quilts


Hello friends! I didn't post my Just Three last month so I'm glad to have made it in time this month. I tend to do a better job at getting projects completed when I have a list to check off. I draw a line through my tasks, it's so satisfying. Like saying "booyah!".

My July three were:

Bowls & Borders Blog Hop, finished!


2. Lydia's diamond quilt/duvet, no real progress to speak of. I did purchase more fabric but haven't laid it out or decided on a few thoughts I've been mulling over. Her birthday is next month so I really want to have it finished by then. I can't believe I started cutting this months ago and still have cut diamonds in a bag. Sad face.
 
3. "A little quilted something. I can't be too specific about this because the recipient may be reading. ;) But I promised the person who helped choose the name of my etsy shop a prize and well, some months and 200 fb fans later....I still haven't done that. I've thought about it and then well, you know how it goes."  Happy to say that this is also finished! No pictures until she receives the item though.
 

My list for September!

1. Super Mario Quilt Along. I'm only making the Mario block to turn into a pillow but can't wait to see it come together. I hope to make the whole quilt someday, it's so fun.

Cut To Pieces

2. A secret quilt project, I have half of one of my parts done and will be working on the rest throughout the month. It's totally top secret but I am looking forward to sharing pictures and the story behind it with you as soon as I can.

3. My block for the Wicked blog hop.


I feel like my goals this month are reasonable and that I'll meet them. I also want to get serious work done on Lydia's quilt but this is Just Three so maybe I'll have a surprie next month. ;)

Thanks for visiting! Go visit Tracey and her Just Three AND her new quilt pattern, it's so much fun.

PS - If you have a blog with those little social buttons did you use a tutorial to install them? I don't speak HTML but can copy & paste if I know where to do so and what to put inside the brackets. Thanks!

Tuesday, September 4, 2012

I Mustache You a Question

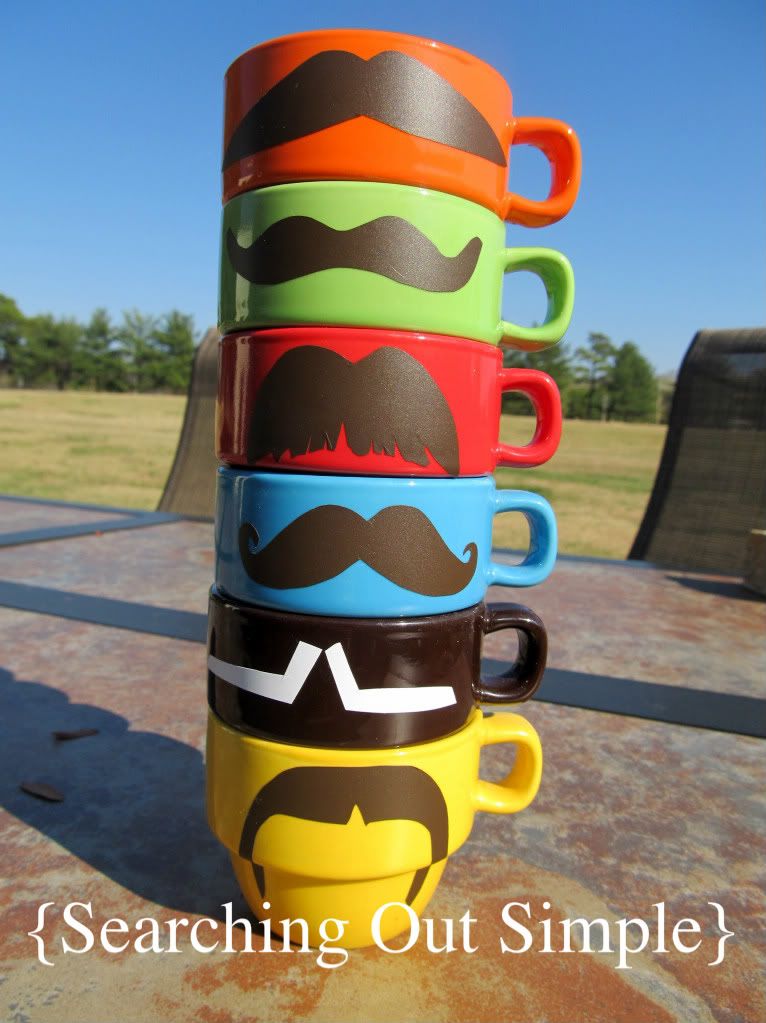
So I have a thing for mustaches.


Photobucket
 
On my espresso cups.
 
 
I put some on a bunting in my shop.
 
 
We had some in our family pictures two years ago. {photo by Overson Photography}


 And recently I made these two mustache quilt blocks. They are for Danielle's Can't Grow a Mo' Sew a Mo' flickr group. I first heard about this while reading Lily's Quilts.
 
I'll let Danielle tell you her story and more about the quilt blocks.
~~~~~~~~~~~~~~~~~~~~~~~~~~~~~~~~~~~~~~~~~~~~~~~~~~~~~~~~~~~~~~~~~~~~~~~
 

Hi I'm Danielle Coolbear Jenkins from D J Coolbear, thank you to Rebecca for asking me to guest post about I project that I have started – Can't Grow a Mo' Sew a Mo'. I am collecting moustache blocks to make into at least 1 quilt to be raffled off at the end of November to raise funds to donate to 2 very worthy charities; Movember and Mary Potter Hospice (Wellington, NZ).

At the end of February this year – 3 months to the day after turning 60 my birth father died, after battling Prostate cancer which had spread to his bones. For more about why I started the project take a look at the Can't Grow a Mo' Sew a Mo' page.

I was discussing the need to do something with my mum – and came up with the idea of a charity quilt, well actually 2 charity quilts; one made by me in the UK and one by her in NZ. I am very passionate about splitting the money raised by the quilts equally between the 2 charities donating to Movember means research into cancers and supporting Mary Potter Hospice means supporting the Palliative care that is provided when the cancer can't be removed or treated and becomes terminal as it did with my father.

After writing a guest post on Lily's Quilts last week the request for blocks to be contributed has spread through out the ether of the Internet – as far as I know from the blocks I have received and seen photos of in the Flickr group there have been 15 blocks made in just a week - I have already received 5 of them and there are more in the post winging their way to me from Canada and Australia. Bringing the total with the 5 that I have made to 20 – already!

In NZ no blocks have been received yet – but I'm sure they will be pouring in soon enough as the word has also spread like wildfire throughout patchwork, quilting and knitting groups all over the country.

So the guidelines for the blocks are: Moustaches - any size, shape, style - as long as they are moustaches only - finished with a frame - ie the quilt will be a rouges gallery. The moustaches can be anything you want - cotton, felt, faux fur, embroidered – as long as they are firmly attached to the block. A block rectangular or square - including a frame - up to 12 inches (plus seam allowance). Have fun with the moustaches and the frames. If you need some inspiration take a look at the Flickr group.

• Blocks are to be square or rectangular - as it will make it easier to fit all the blocks together whilst maintaining a rogues gallery look.
• The finished block sizes - anything up to 12 inches, so 12.5 inches with seam allowance.
• The finished block must have a frame, of any design - as simple or fancy as you like. Pieced, appliquéd or even embroidered or painted is great as long as the fabric used for the block is 100% cotton.
• Any colours you like.
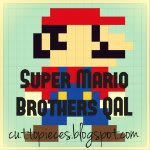
• Draw inspiration from the Mo's of the men in your life or from famous Mo's - If stuck for inspiration I have drawn up a few (can you guess the Mo's - some are a bit obscure).
• Mo's can be made of which ever fabric you want to use - blocks and frames however to be 100% cotton as it will make it easier to piece the top.
• Machine appliqué with topstitch is probably easiest - especially with some of the fancier moustaches.
• Blocks are to be back to me (in the UK) by the end of the first week of October at the latest. So I have time to piece the tops and get the tops to the quilters in time for launching the raffle at the start of November.

Thanks to Amy for suggesting the Sublime Stitching free embroidery pattern.

If you would like to contribute a block to the project either my quilt in the UK or my mum's in NZ email me at: danielle@djcoolbear.co.uk and I will send you the mailing address/es. Also please join the Flickr group and post your blocks. And here's a button to spread the word even more.


~~~~~~~~~~~~~~~~~~~~~~~~~~~~~~~~~~~~~~~~~~~~~~~~~~~~~~~~~~~~~~~~~~~~~~~~
 
Thank you for sharing Danielle!

Here are some more mustaches that have been made so far.


Will you sew a mo', grab a button or help spread the word?
 
Thanks for visiting!

Sunday, September 2, 2012

Upcycled Baby Hat Tutorial

In case you missed it last month {July} here is my latest contributer post at Honeybear Lane.

Today I’m going to show you how to make a simple baby hat from a shirt. It can be your shirt, a child’s shirt, even a sweater would work. Just be sure to check for holes or stains when cutting fabric so your hat doesn’t end up with a hole or stain.


Gather your supplies.


upcycled hat supplies
I’ve used the hat that my youngetst had at the hospital to ensure my hat would be appropriate size for a newborn. Though, you can use any size hat you’d like, as long as your shirt is large enough. This hat is lined so we’ll be making two hats and putting them together at the end. Lay your hat at the bottom of the t-shirt, using the hem already there. Cut around the hat leaving about 1/4″ for seam allowance. You’ll do this twice so be sure to place your hat leaving space for another.
 
 
Make sure your pieces are right sides together then using a zig zag stitch about 1/4″ from the edge sew both sets of pieces together. Double check that you’re using a ball point needle when working with knit fabrics.
 

outer & lining

This is what you should have now. You’ll want to insert one into the other, making sure that you turn the outer piece right side out. Then I used a wide zig zag around the bottom to sew the two pieces together. The hat folds up and because it is lined there are no seams exposed. Here you can add a button, ribbon or trim of your choice. I chose to leave this one as is before sending it away to his mama.

 
So there you have it, simple baby hat at virtually no cost and very little time.
 
Thanks for visiting!
 
~Rebecca

Friday, August 17, 2012

Bowls with Borders Blog Hop

Hello friends! I am SO excited to be a part of this blog hop. It's my first time participating in a quilt blog hop and my first time paper piecing. I won't lie it took me some time, ripping seams, asking another quilter friend for help {aaand I may have banged m head on my ironing board a few times}. BUT I absolutely love it. Once I 'got it' it was much easier and fun and while I'm not an expert I will be doing more paper piecing. I have more ideas in mind already and some things pinned. {btw, it was the actual process of paper piecing that I struggled with, not the pattern. It would have been faster for me to learn seeing someone do in person but I there is a helpful video HERE if you want to paper piece and haven't before}

Before I show you my bowls I want to thank Madame Samm at Sew We Quilt for organizing this blog hop, Carol from Just Let Me Quilt for hosting and of course Regina for her lovely pattern you can purchase HERE. It was well written, includes additional applique options (I didn't use this time) and there are so many ways you can stack the bowls. Many short stacks, long stacks. They can be made into wall hangings like mine are or I've seen table runners and snack mats, you could make a full size quilts and with adding borders any size you'd like.
Finally! Here are my Tipsy Bowls. You do have to be careful the bowls don't fall over. At one point they were ready to crash to the floor. I'm still not sure exactly where I went wrong but tipsy feels fitting for my kitchen where this will hang. If only piled up dirty dishes were so attractive. ;) I mostly used greens and oranges with pops of aqua, reds and browns. The colors go with my kitchen accessories.


Here are some close up shots. :) Some of the prints remind me of pyrex bowls. I love vintage pyrex and hope to have my own set one day. You can also see a tiny peek of what I pictured to be a 'tablecloth' on the bottom of the bowls buuut I forgot to add a border to the bottom and my binding covered mostof it. Sad face.


I left the trim piece off of my chicken bowl so the chickens and eggs could be seen. I really really love this print.


I also used some unconventional fabrics for quilting. Do you see the eyelet? I love eyelet so I had to include some. I backed it with a piece of white cotton so the batting wouldn't peek through. And the chevron? It's more of a home decor weight than quilting weight. But I loove chevron. Please ignore the blunder on my ric rac print. It was late and I couldn't bring myself to rip a seam or start over.


This veggie print is also one of my favorites, that along with the green border print and the print used for the bottom bowl were fabrics I bought with my kitchen in mind. I look forward to making other items with them soon.


This top print reminds me of Pyrex also and the reverse of it would be similar to the pattern on my dishes. I would have continued piling up these bowls but ran out of prints to use. It was a lot of fun and I'm thinking of bowls to make for others.


Here you can see the quilting more. I did a freestyle zig zag on both borders (uneven on purpose), then did approx 1/4" lines. I outlined the bowls and stitched the ditch between each bowl.


Thank you so so much for visiting! I hope you'll come back and see me again.

Here is a list of everyone else participating in the blog hop today! I can't wait to see more bowls. You can find the full schedule of participants HERE {runs August 13-28} as well as the pinterest board HERE.
August 17th


Also linking up to:


Weekend Bloggy Reading

Friday, August 3, 2012

Bella Pouch Winner

Good morning friends! I am enjoying a cup of coffee {maybe my third} and hoping to sew some today. But first I have a winner to announce! Congratulations....Sarah Norman!


I will be contacting you via e-mail as well and giving Bonne from Pink Stitches so she can send you the pattern.

Thank you to everyone who entered! If you'd still like the pattern you can purchase it in Bonnie's Etsy Shop. She has also added some darling pouches to her shop. My favorite is the deer head with glasses, check them all out here.

Bonnie, thank you again for letting me review your pattern and give one away to my readers. xoxo

Thanks for visiting!

Monday, July 30, 2012

Bella Pouch Pattern Review & GIVEAWAY

Hello friends!

I haven't been around much, busy with the kids and life. I'm so happy to be here today with a pattern review & giveaway for you. Bonnie from Pink Stitches was so kind to send me her pattern for the Bella Pouch to review & giveaway one to a lucky reader!

Ever since I saw this pouch I pictured it in this chicken & rooster fabric I had. I think it's fun and cute. It holds my camera perfectly with room to spare for other items, if I had a second camera I would have taken a picture to show you.


I paired it with this ric rac fabric because it had the green, aqua, red and brown. Don't you love those roosters? I had to fussy cut to get the rooster on in the corner and didn't realize his head would be covered. Oops!

For the interior fabric I used a brown & white dot fabric. And the rooster fabric for the pocket {optional}. There are so many ways you can change this pouch up. You can do all the same fabric, two fabrics or three like I did. Really, you could throw in a couple more if you wanted. The inside pocket is optional. And you can add a D ring & wrist strap, but I coudn't find the lobster clip that would be used on the strap.

This pattern was well written, included great pictures of the steps and it's very easy to make. Plus, it only requires 2 or 3 fat quarters, some interfacing & batting. If you haven't used a magnetic snap they are really easy to install and don't require a special tool.

Do you want to make your own? Enter using rafflecopter below, the first entry is mandatory - simply leave a comment telling me which fabrics you think you would use for your own pouch. Everything after that is extra. The giveaway will run from today {7/30/12} through Thursday {8/2/12} and I will announce a winner on Friday!

If you don't want to wait for the giveaway or you don't win {sad face} you can click HERE to purchase the pattern from Bonnie's Etsy shop, Pink Stitches. You can also find Bonnie and what she's up to at her blog Pink Stitches.

  a Rafflecopter giveaway
Related Posts Plugin for WordPress, Blogger...