Sunday, May 29, 2011

Lego Party Planning

My son will be turning seven this summer. Seven. Oy. He has had a Transformer themed party two years in a row and he's finally ready to change things up. He decided on Legos. This year he got his first set of 'real' Legos and our family has played the Lego video games on the XBox. There's just something about those cute little Lego pieces that draw me in! ;)

I've been searching the interwebs for all things Lego party and found some great inspiration for fun cakes shaped like Lego heads or blocks, printables for purchase and several fun and colorful parties. My biggest source of inspiration was from Amber at I saw that going differently in my mind. First it was her invitations, then the pinata and the Lego man game, and the banner...and well if we were neighbors I would knock on her door and ask if I could pretty please borrow her party decor because it's all so fabulous. You should check out the action shots of her son's party, it looks like they had a blast!

Photobucket

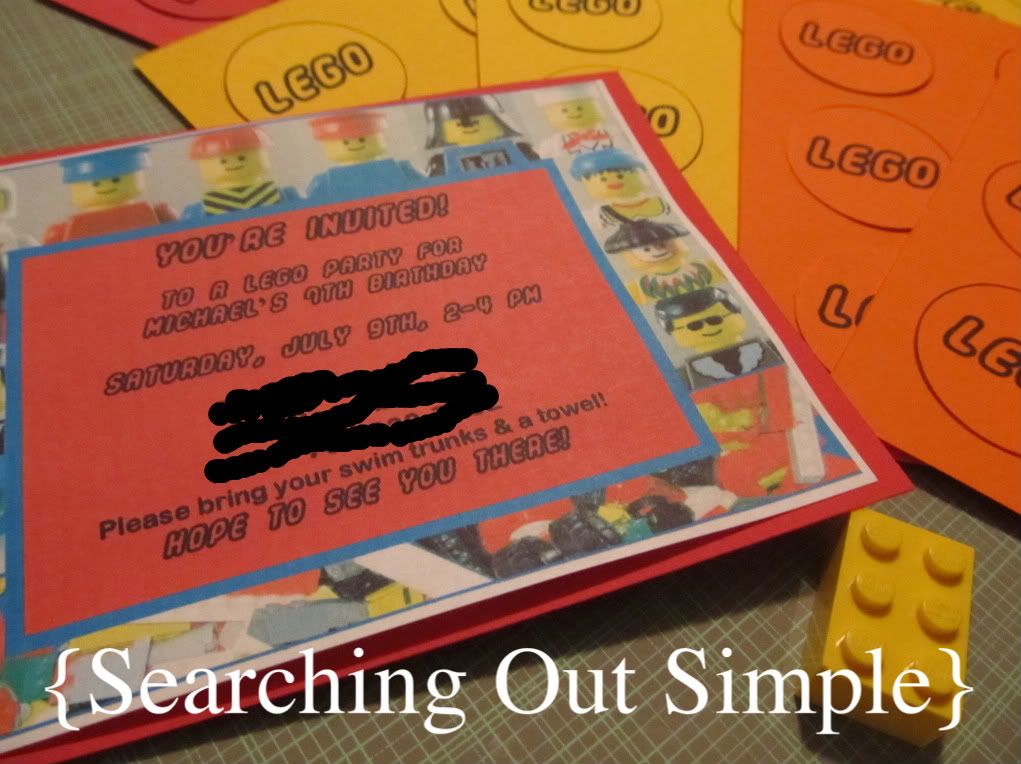
These are the invitations I made. I used a free Lego font I found online along with images I found and put it together in Publisher. Once the invitation information was printed and cut I matted them to cardstock. Then I used the Lego font again and made a circle with LEGO in it the same size as a circle punch I have and glued those on too. Because I'm a little OCD I had to check a real deal Lego and make sure I put the circles the right direction.

Photobucket

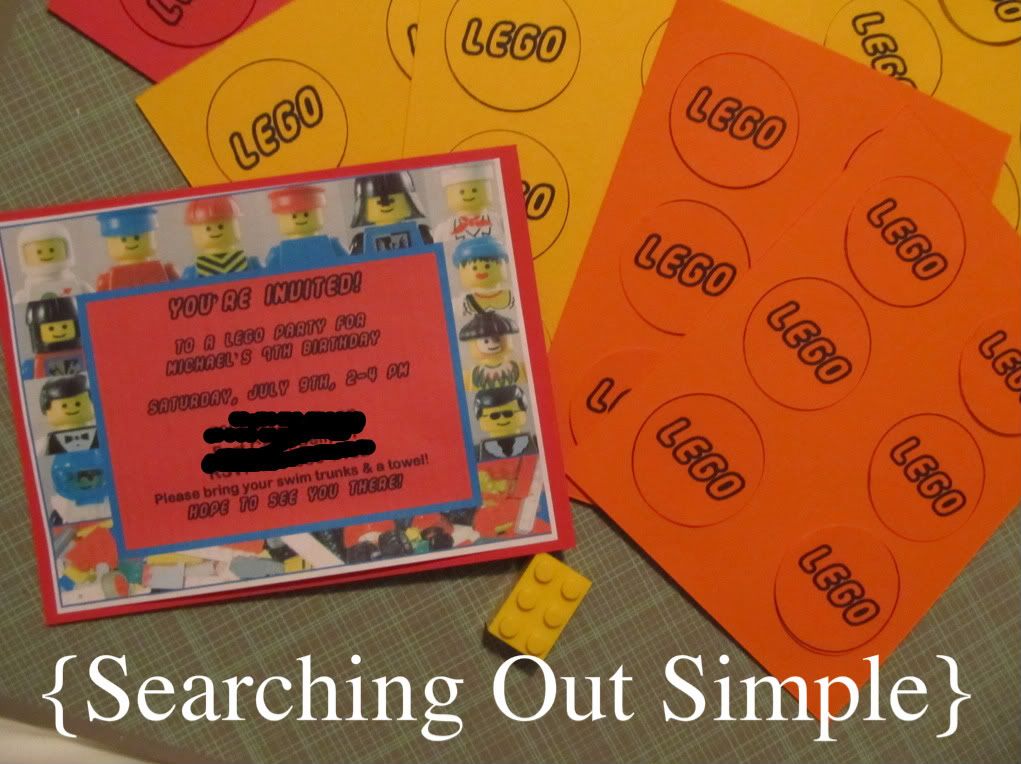
Michael was ecstatic over them. He saw the front part earlier but once he was in bed I finished them up so the back was a complete surprise. Making decorations and such for the party will be the easy part. Hoping guests actually show up since we invited them two months early is what makes me nervous. I will be getting more paper this week and hope to finish up the rest of the decor so I can start planning and preparing for my baby's first birthday party two weeks later. I *think* I know what I want to do but haven't quite pinned it down yet.

Thanks for visiting!

Linking to:
sew many ways


Thursday, May 26, 2011

My Ruffled Curtain

You may have seen the ruffled curtain from Anthropologie or similar ones around the internet. Ruffles seem to be a hot item right now so it's no surprise that it's popular. I came across this tutorial by Leanne at Elle Apparel to make one some weeks ago and it's finally finished. I am going to pin some more of her tutorials when I'm done writing this because, wow is she fabulous. The directions on her tutorial were so clear, there were lots of pictures and she was completely honest about how tedious and challenging this project could be. I knew full well I'd likely want to poke my eye out, possibly throw my machine out the window and maybe even want to quit. So if that sounds like fun go make your own ruffled shower curtain like this one. ;)

Photobucket

Aaahhhh...isn't she pretty? I know that doesn't sound very modest but I'm just so glad to be done and seeing this in my bathroom puts a smile on my face. I'm inspired to tidy the bathroom more often now. The ruffles are too pretty to be in a messy bathroom right? It even makes the sloppily hung towels look good.

Photobucket

I love the interfacing used at the top of the curtain. My old curtain would sag and wrinkle and it annoyed me. I will paint the shower hooks black when I have a can of spray paint and we have a dry day.

As I said before the tutorial was great. But there were some things I did differently because of my work space and what I thought was a great idea {but might not have been}.
  • I bought cheap inexpensive flat sheets from the same store I bought towels so the colors would match and I figured it would be less expensive than fabric. It may or may not have been but I'm just telling myself it was the way to go.
  • I also thought using sheets would save me some hems and it did but it also caused some issues with my measurements and I had to make adjustments in my pinning later.
  • I don't have a large cutting space {just a 12x12 cutting mat} so rather than measuring for my shower curtain I laid out a sheet, then my old shower curtain on top and cut around allowing for seam allowance}.
  • Fitting the whole thing into my machine was difficult and me and Mr. Seamripper became good frenimies as I had issues with fabric catching underneath. I found {after 4 rows of ruffles and choice words} that rolling both sides up and going slow helped. I think I had one row without catching, seam ripping and resewing.
Photobucket


We've had the same bathroom decor since getting married six years ago so I'm excited for the change. These colors and style is more me now than my old stuff was. I'm looking forward to getting the rest of the bathroom made over. Here is my short list of things to do.
  • Window treatment
  • Makeover wall art
  • His/Hers signs
  • Finish linen closet organization
  • Make/get new rug
Thank you for visiting! I'll be posting the above projects as I complete them.

Linking to:


Weekend Bloggy Reading

Fancy This


sew many ways


Tuesday, May 17, 2011

Where Necessity & Creativity Meet

A few months ago I caught a special that Say It On the Wall had on their facebook page. The timing was perfect and I ended up getting a set of ten vinyl kitchen labels for half price. I couldn't wait to label my food and yes, I realize how sad that may sound to some. ;) I'm okay with that. I still need to collect more glass jars/containers for other dry goods but one day my pantry and cupboards will be pretty. You can see how I used more labels and store my flour here.

Photobucket

Having the rice labeled all pretty was great. But I still had to keep the bag that the rice comes in to look up the ratio of rice to water depending on my serving size needs. This was annoying & cluttered my cabinet which defeated the whole point of labeling canisters. I finally got my hands on some vinyl to try out with my Cricut and an idea was born.

Photobucket

I have the smaller Cricut so I can't cut anything smaller than 1" and my font is different and I don't have a fraction option but I'm still happy with how this turned out and it serves it's purpose. The S, W, R stand for Servings, Water, Rice. I used decimals instead of fractions to save space so 1.3 is 1 1/3 cup. I also put the cook time at the bottom as a reminder. Plus I was having too much fun.

Photobucket

They aren't on completely straight - that is tricky on a curved object - but I don't think anyone else here will pay much attention to that. I'm going to share this idea with Laura at Say It On the Wall because I'm sure she could make measurement labels like this for rice, oatmeal, pasta and other items people might want that don't have their own cutting machines or the desire to make their own.

Thank you for visiting! If you are here from Amanda's crafty cutter party {or have a cutter of your own} I have a question for you. How do you store your sticky mat so that it doesn't get dusty and lose it's stickiness?


Linking to:
Serenity Now Crafty Cutter Party


36th Avenue

Tuesday, May 10, 2011

A Label for Everything and Everything with a Purpose

I love my morning {and throughout the day} coffee. What I don't love is dirty dishes and counter tops. I started using a tea cup I picked up at a thrift store to hold my spoon. The tea cup was going to be used for my oldest daughter's fourth birthday tea party but that didn't work out. It's okay though, now she has a new purpose in life. Holding my coffee spoon so I can stir in my cream and sugar with the same spoon through the day and keep the counter clean.

Photobucket

I finally introduced vinyl to my Cricut. Now everyone knows what tea cup's purpose is. Or they'll want to go cuddle someone. It works.

Photobucket

I have another vinyl labeling project to share soon. Hopefully with better pictures next time.

Thanks for visiting!

ETA: If you are here from Amanda's crafty cutter party {or have a cutter of your own} I have a question for you. How do you store your sticky mat so that it doesn't get dusty and lose it's stickiness?

Linking to:


Serenity Now Crafty Cutter Party

Sunday, May 8, 2011

Dollar Store Storage

We have a tiny house. In our tiny house is a tiny bathroom between the kids' room. The only storage in the bathroom is the medicine cabinet and one cabinet below the single sink. With the pipes and bath toys there isn't much room to store towels. Until recently I kept the kids' towels in the linen closet in the main bathroom. It worked okay but I thought it would be more fun to not have to go get a towel each time they forgot one. ;)

Enter the dollar store. My dollar store's basket selection isn't as grand as some I've seen on the interwebz but it had enough for me to work with.

Photobucket

Two simple baskets hung with screws. The lighting and shadows are bad but it's a tiny bathroom which makes it difficult to get a decent picture in.

Photobucket

I managed to get them level without a level or ruler or anything. I know they aren't the prettiest things, the green isn't so bright in real life, but they serve their purpose well. Maybe one day I'll get around to building little boxes from the pallets sitting out in my yard.

Photobucket

Here you can get an idea of how small the bathroom is. One door opens into the bathroom, just shy of the sink, right next to that is the shower/tub. Above the toilet is a towel bar for towels to dry.

You can't leave the dollar store with just two baskets though right? I have some more dollar store storage to share soon.

Thanks for visiting!

Linking to:


Tuesday, May 3, 2011

8 {and} 9

Delilah will be ten months in a few weeks so I should share her 8 & 9 month photos right? If you're new around here this is a fun thing I've done each month as a fun way to see her growth and change. It's going so fast, seems faster than my older two. I miss her being tiny, and not trying to tear up the paper ;) but am having fun with my growing girl. She crawls all over the house, chasing after me saying "mama, mama" <3 <3 <3. She is starting to pull up onto her feet, sometimes with the couch but mostly just with her hands. She has four teeth and likely more to start coming soon.

Photobucket

We had nice weather in March so I thought it would be fun to take some pictures at the park. She thought it would be fun to eat bark. And swing. She loves the swing.

Photobucket

In April we had rain. The ground was still wet this morning so I took pictures inside. I'm not totally loving my camera for indoor pictures and wish I had put a blanket out on the ground instead. I do love this dress though and she loved the pearls.

Photobucket

And these were some I took for fun sometime between 8 & 9 just because it was a pretty day out and I loved her outfit.

Sunday, May 1, 2011

Kitchen Wall Art for $2.17

I have a galley kitchen. It has a lot of cabinets, drawers and decent counter space so I like it even though it's not very spacious. My favorite thing about it is the big empty wall. It's mostly been empty for over two years so I'm excited to finally fill it up.

While looking at some blogs I frequent I saw this post on Sugar & Dots. I loved all of the color in her kitchen and pin'd {it's the new bookmark} several ideas then saved her freebie. I'm a sucker for a printable. I loved the colors and the text.

Photobucket

I checked www.retailmenot.com for a coupon code at snapfish.com and found one for a free 11x14 poster. Sweet! Uploading the print was easy, I chose a fun orange frame {could have gone with no frame} and paid $2.17 for shipping. I already had the frame and it was primed from when I painted over sunflowers I didn't care for. I had blue paint on hand {just happened to match the background of the print} for the trim. Throw in some mod podge and voila!

Photobucket

Here it is with a couple more pieces. My menu board isn't quite finished yet and I have something else in mind for the number art. I won the printable from Kimmie {Sugar & Dots} on a facebook drawing. The dates are our children's birthdays, our anniversary and the date my husband joined the army. I have a few other things in mind for this space also and can't wait to get it all finished.

Photobucket

Here you can see most of the wall and space. To the left is the entryway to the dining/living room so there's really not space for a counter or island. The placement of these things is a little off but will get fixed when I have the rest of the pieces.

Thanks for visiting!

Linking to:


Related Posts Plugin for WordPress, Blogger...