Wednesday, November 30, 2011

A Nifty Idea {& Sneak Peek}

Last week I was painting something and used an old frosting container to mix a color in. It was the right size and won't dry up. I quickly labeled it {poorly} with a sharpie but will be putting a nicer label on with vinyl. Too far? Oh well. ;)


Neat right? I thought so. More to come on the painted project. {as soon as it's actually, um...painted}.
Thanks for visiting! Have a great day.
Pin It

Wednesday, November 23, 2011

{P}inspired 2

Happy Thanksgiving to my fellow Americans! And to my other friends I hope you have a wonderful weekend and enjoy some pumpkin pie also, that's good any day right? I have my cranberry sauce made and chilling, turkey thawing and cleaning up the house for company tomorrow.

I wanted to share something I made last weekend that was once again inspired by Pinterest. <3 It's a garland made from pinecones.


They were a little fussy to hang without flipping forward. I made 11 'flowers'.


Some have tiny pinecones for the center and some have the original pine cone tops I clipped off when taking the leaves/petals/whatever the pieces are called apart.


My camera takes better {and even then not great} pictures outside.


But really it's on my hutch. Because I don't have a mantel. Or a fantel.


Just think if my hutch was painted {like I've been wanting to} the brown pinecone flowers would pop against the blue/green/aqua/whatever color I decide on.

The tutorial to make these was fabulous. Jessica painted some of hers white, loved the look of it but ran out of patience by the time I pulled the pinecones apart and hot glued them together. I'm pretty sure I lost another fingerprint that day, but who needs those right? I used an old pair of jeans to cut circles to back the flowers and glued that to another denim circle with the yarn in the middle, like a sandwich. I put three nails in the top of my hutch {which I'm sure will come in handy with other decor down the road} and finagled wiht them until they all sat properly. I wanted more of a 'swag' but I think the yarn isn't heavy enough for the bulk and weight of the flowers.

What I really like about this is I can keep it up through fall and winter. I don't have room to store bins of decor and change things out often so multi-seasonal use decor appeals to me.

Thanks for visiting!
Pin It

Linking to:


sew many ways
Weekend Bloggy Reading
Handmade Holiday Series

Sunday, November 20, 2011

Quick Baked Burritos

So far this blog has mostly been about my crafting and sewing. Which is funny because that's not really what I had planned when I started it. At the time I was making a lot of changes in my cooking and choices of products used. I was cloth diapering my baby after using disposables for my older two. I was buying more ingredients and less food. I wanted a simpler life. I was {and still am} dreaming of living on some land with diapers drying on a clothesline and some chickens running around the yard. Or in a pen so the dogs don't eat them. I'm not going to abandon my crafty posts, are you kidding? You are probably the only people that are really interested in the things I make. But I do want to start posting more about the other things I have interest in.

Last week I needed something quick for dinner using the few things left in my pantry & fridge before shopping day. I had some refried beans and decided on burritos but I wanted to jazz them up a little. Enter leftovers from the fridge - some diced tomatoes & corn. And I threw in a can of green chilis. Those are a staple in my pantry - but I'd really like to try canning them myself.
edited to add: I also put in 2 tbsp of the fajita mix I make, equivalent to one packet.
Photobucket
I meant to get a picture of everything before stirrint it up but forgot. There was a hungry baby screaming asking for dinner who distracted me.
Photobucket
Don't let that cuteness fool you, she can be trouble.
Photobucket
Put filling in tortilla, top with shredded cheese {I used colby}. Wrap up burrito style and place in 9x13 pan {or whatever size you have handy. Top with enchilada sauce & more shredded cheese. I had green chili on hand so that's what I used. I could have made red enchilada but didn't feel like making it that night. Bake @ 375* for about 15-20 min.
Photobucket
Top with a dallop of sour cream and serve up with rice. I made brown rice because I love it. Brown rice takes 45 minutes after the water comes to a boil so when I'm using it I always start that first and usually the timing works out that things are done at about the same time, if not just keep the lid on the rice and it will keep warm. If your kids are like mine you'll need to put some soy sauce on that rice. Yeah, I don't get it either. Enjoy!
Thanks for visiting!

Wednesday, November 16, 2011

Chevron Cork Board

I shared this over at Type A last week but in case you missed it, here it is again.
Some might say I'm cheap but I prefer thrifty. Why buy new when you can find gently used? My husband appreciates this about me and brings home 'goodies' for me on occasion. Recently he brought home a large cork board they were getting rid of at work. My son has been in need of a place to hang his drawings and things he likes to look at so I knew this would be perfect for him. {truth be told I still have a cork board sitting in my laundry room waiting for a makeover but I've already claimed it for myself}.
Being the impatient person I am I started on the project right then and there and used what I had on hand. I'm sure I broke at least 3 'rules' of DIY but I'm a rebel like that. ;) Sadly I don't have before pictures for you as the blue screen of death attacked my computer so all pictures taken before that happened are being held hostage until I can get the computer repaired or rescue the pictures. {say a little prayer for my pictures that weren't backed up please, and then back up all of your pictures when you're done reading. thanks}
Without further ado here is the made over cork board.
Photobucket

I used priority mail tape in place of painter's tape. For the most part it worked but you can see some places where I didn't press it down firmly enough. Did I mention I was impatient? When I start a project I want to see it done like yesterday. That would also explain the paint lines, I just assumed you wouldn't be able to see them on cork. Well, you can. I also painted the frame after peeling off the 'wood' laminate.
Photobucket
Two of these plastic pockets were on the cork board, originally hanging the other direction. I thought two was too many but one gives my son a good place to keep school library books so they don't get lost or ruined. I used my Cricut to cut his name out with card stock {I was out of black vinyl} and mod podged the letters to the pocket. He chose a dark blue color for his name.
Photobucket
I know the chevron pattern is very popular and maybe even overdone in the blogosphere but he liked it and it was an easy pattern to make quickly.
Photobucket

Thanks for visiting
Pin It

Monday, November 7, 2011

Another Cork Board


Happy Monday morning! Today I'm a guest at Type A. If you haven't met Tammy yet you should go over and check her out. You can see the other cork board makeover I promised you last week.
 
Thanks for visiting!

Sunday, November 6, 2011

{p}inspired

I recently shared my love of Pinterest with you. I have 34 35 {and counting} boards and 1,434 pins {honestly I thought it was more}. This weekend I started my attempt to pin less and do more. So far I've got three down and a million {so it seems} to go
Photobucket
This is cream of something. It's a dry mix that when added to water & heat becomes cream of something soup. You can use this in place of canned soup in recipes or to make a cream of something casserole. See the original pin for more details on that. My family loves it and cream of something casserole is on my meal plan at least twice a month. I used vinyl and my Cricut to label the mix/water measurements. I am going to print the recipe and tape it to the other side of the container.
PhotobucketPhotobucket
My response to this idea was "why didn't I think of that?". My salt container was almost empty so I put the rest into my shaker. Then used a mason jar lid to trace a circle, cut and screwed the cap around it. I wrote 'sugar' as a temporary label to prevent confusion. I want to use some cute scrapbook paper and a tag label some time. For now I love this.
Photobucket
And this is my favorite project of the three. Serves no practical purpose but they're cute right? And when you drink espresso or hot cocoa from them it looks like you have a moustache. I don't have any action shots yet but soon I hope.
Photobucket
I'm not really digging the white moustache. I have thought about changing it to a bow tie or a pair of lips. Or redo the skinny stache. What do you think? These cups have matching little saucers and I thought it would be fun to dress them up also. Maybe with bow ties? Not sure how the fu manchu would look with either of those. ;)

Edited to add: Thanks to Jen for asking and bringing this to my attention. I forgot to say how I did the moustaches. Oops! I used vinyl and some sharp scissors. I traced images I found onto paper, cut them out then traced onto the back of my vinyl. This would have been easier to do using my Cricut {or a Silouhette if I had one} but I still haven't figured out the new craft room on the website. The picture that I saw looked like they were painted on or maybe done with a sharpie. I have put my 'spoon' cup in the dishwasher, top rack and it was fine. Though I prefer to handwash most of the time, just to be safe.
Thanks for visiting! I'm hoping to have {p}inspired projects at least twice a month. What have you been pinning?
Pin It
Linking to:


sew many ways

Weekend Bloggy Reading

Saturday, November 5, 2011

Pinterest {love}

Are you addicted to Pinterest? My brother asked me what it was one day and I told him it was crafters' crack. Is there a support group? If so don't tell me about it. If loving Pinterest is wrong, I don't want to be right. If you haven't been sucked into introduced to the world of Pinterest it's like bookmarks but with pictures and organization. Be still my heart, the organization! If I could I would have boards within boards. {maybe someone from Pinterest will read this and make that happen}.
Photobucket

See?! Isn't it awesome! I have party, decor, food, things to do with kids, and many many more categories. It can also be very a major time suck. Not only is it a great place to keep track of ideas and inspiration but it's a fabulous place to search for ideas and inspiration or just browse the 'everything' category for hours and hours.

You can follow me here. If you would like an invitation to join just leave your e-mail or send me an e-mail and I can send you an invitation.

I've been doing a lot of pinning. A. Lot. While I can't say that I'll stop pinning, even for a hour day, I am determined to actually do some of the things I've pinned. I have seen Pinterest challenges on facebook and in the blogosphere, great idea right? Come back for some Pinterest inspired projects!

Tuesday, November 1, 2011

Come to the Dark Side {we have candy}

Happy Halloween! Well, happy November really. Had I not waited until the day of to make a costume I could have shared pictures before Halloween but that's the way the cookie crumbles sometimes. At least my cookies. You'll probably want to ignore half of what I say. I have a candy sugar high along with a coffee induced coma on top of another sleepless night so much of this may be gibberish or rambling. Thanks for sticking with me. ;)

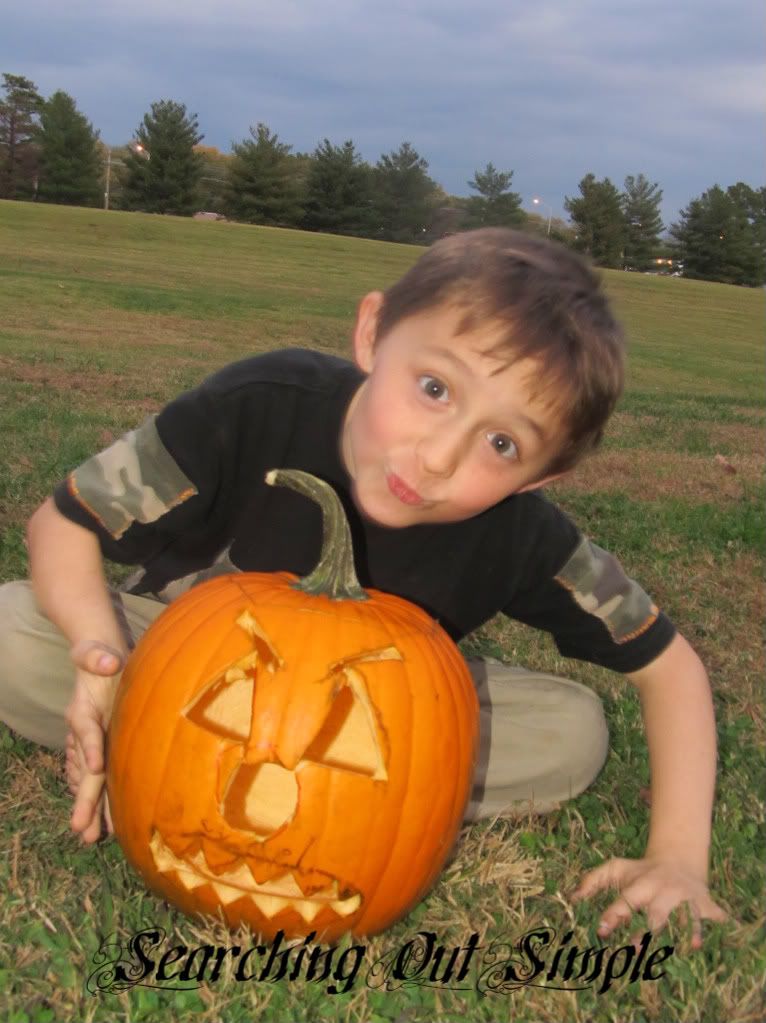
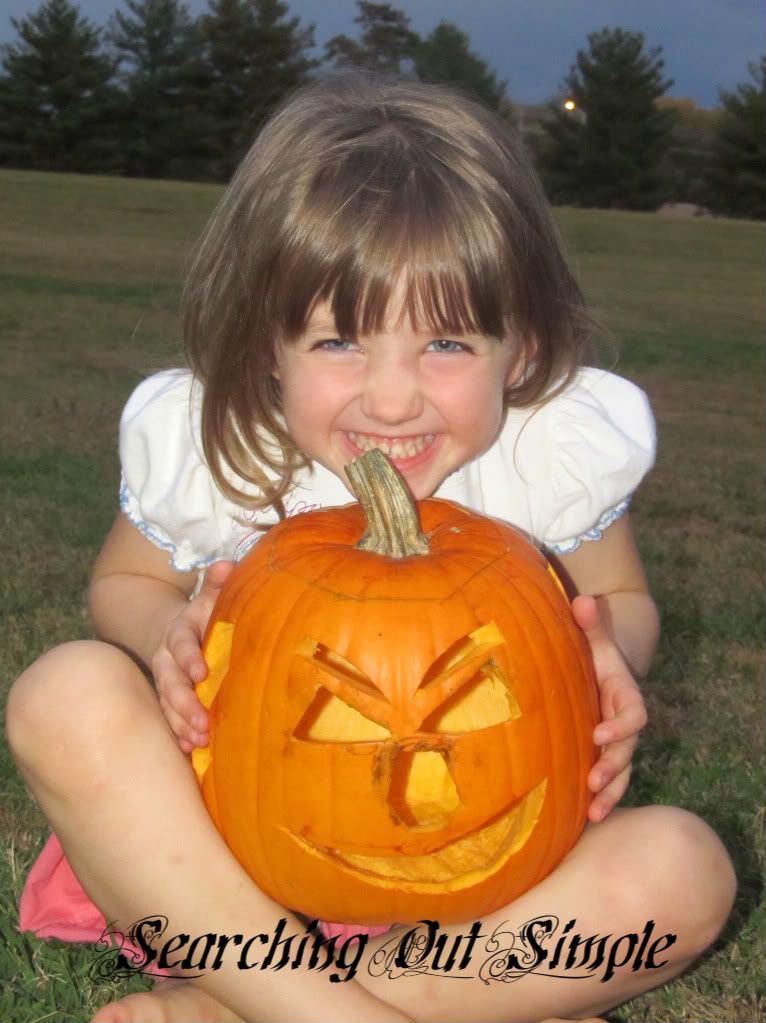
The kids helped carve pumpkins, and then I killed them by leaving them on the table. Apparently carved pumpkins prefer the cool outdoors otherwise they start to wilt er melt? Either way, they weren't looking cute. Fortunately I got some pictures of my pumpkins with their pumpkins before they got too grody. Does anyone else say grody {sounds like grow-dee} anymore?

Photobucket

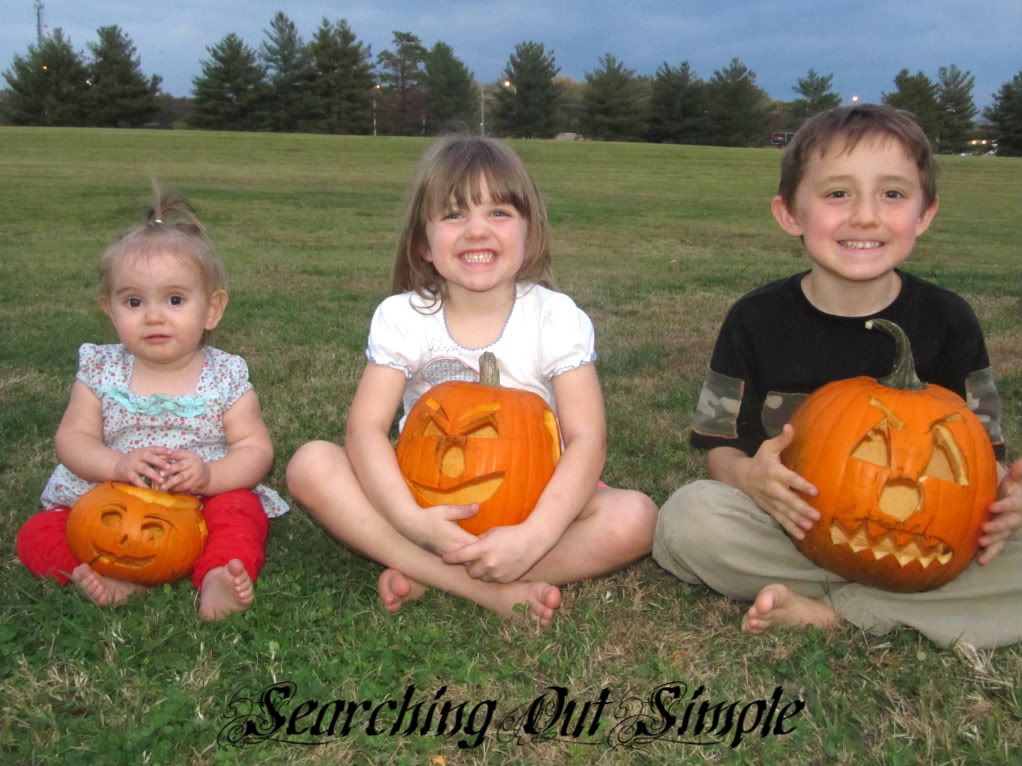
Aren't they cute? I know, I'm biased. ;) I managed to get some individual shots too. With Delilah walking around and having her own ideas of what she wants to do pictures are getting to be more challenging.
PhotobucketPhotobucketPhotobucket

The kids drew their faces and daddy carved them out. I drew Delilah's, and added some bows on the side. Lydia put pigtails on hers. They had fun. Next year I'm hoping to do more decorating with pumpkins and so many fun ideas I've seen to use fabric, paint and creative carving.

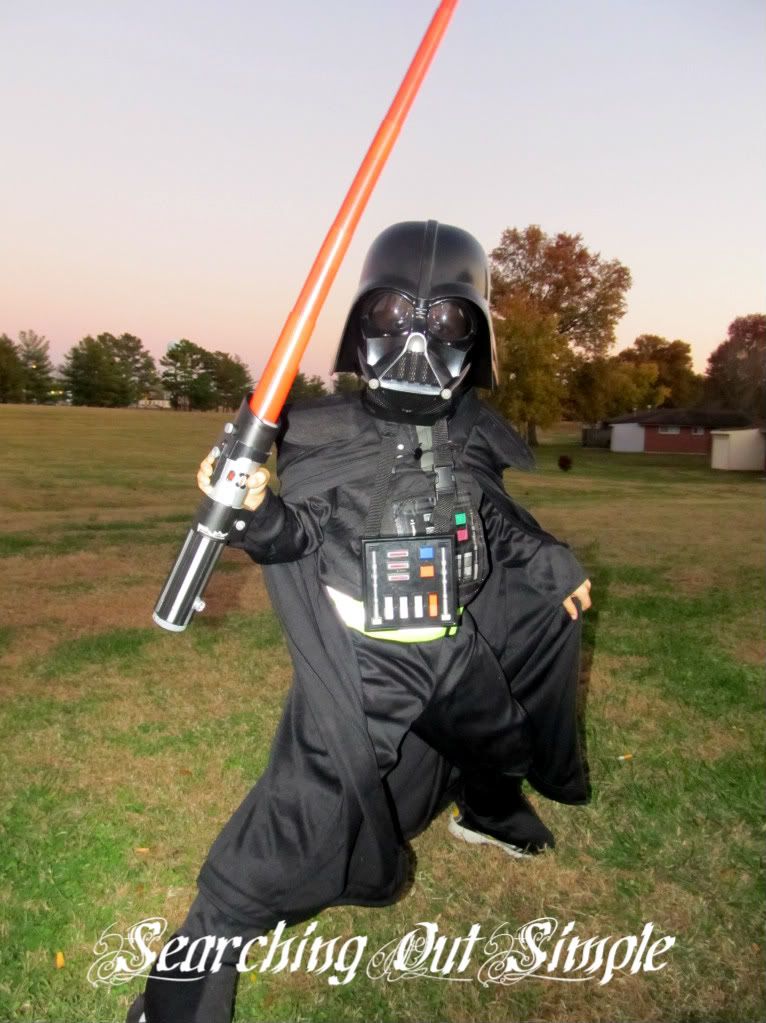
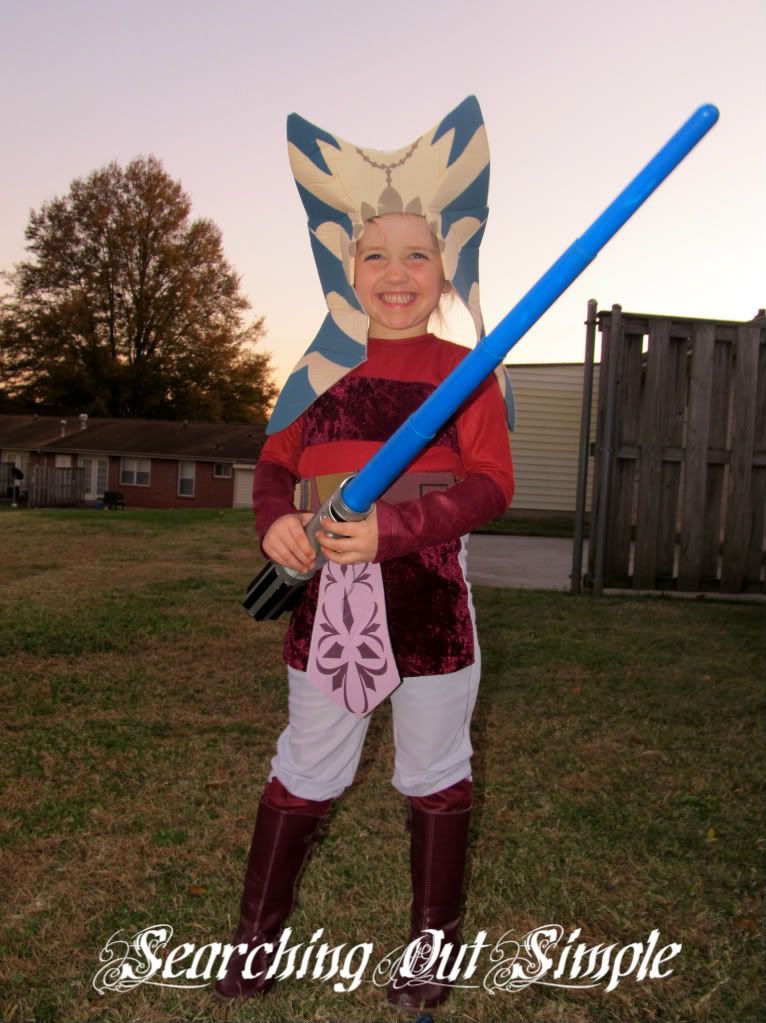
STAR WARS invades Halloween
Photobucket
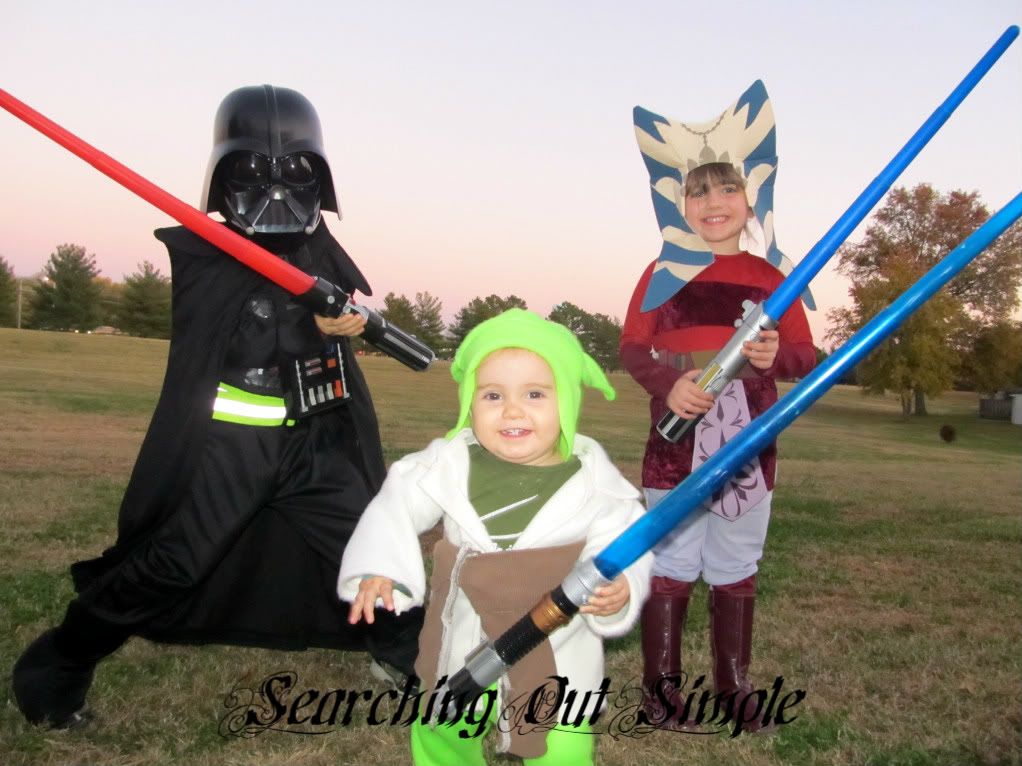
I think the force is strong with these ones don't you? I asked the kids to come up with a theme that they could all dress up as. They both agreed on Star Wars. They like the movies and video games. Score!
Photobucket

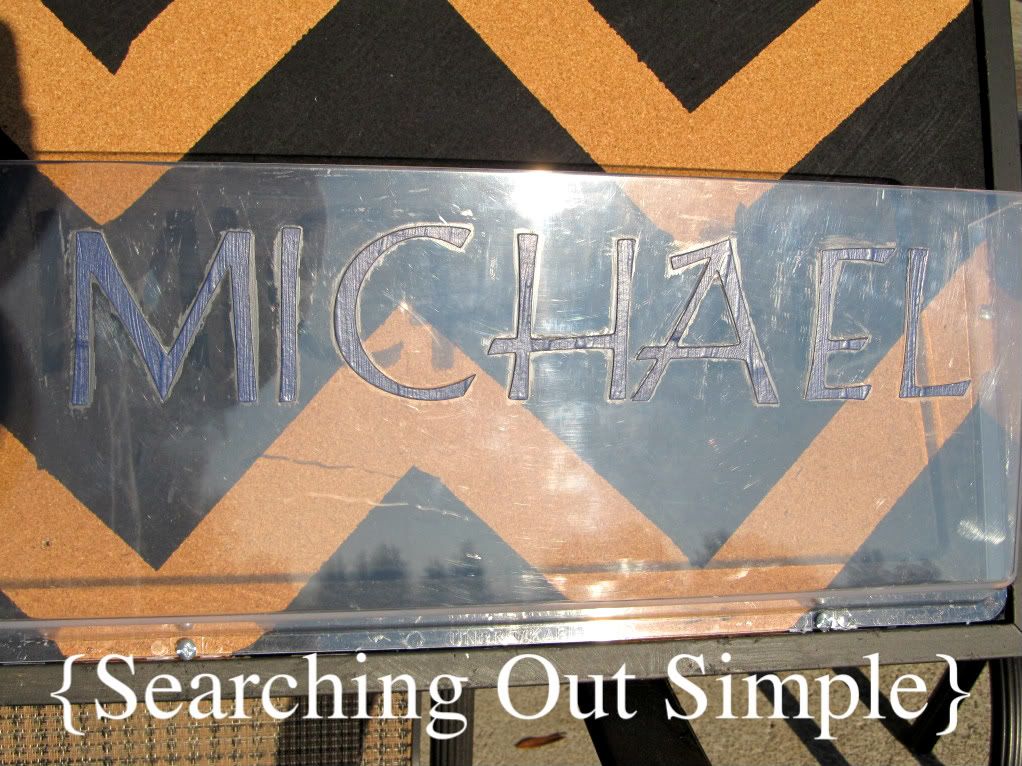
Michael was set on being Darth Vadar. We got him the red light saber because he had a blue one. The helmet had a fun voice setting to sound like Darth Vadar but it was also heavy and difficult to see through so he wore a smaller mask for most of trick or treating.
Photobucket
I thought for sure Lydia would choose Princess Leia or Queen Amadala but she wanted a light saber. So glad we found an Ahsoka costume! She's a jedi character on the game and pretty kick ass. Her boots matched perfectly with the costume. Lydia was thrilled.
Photobucket

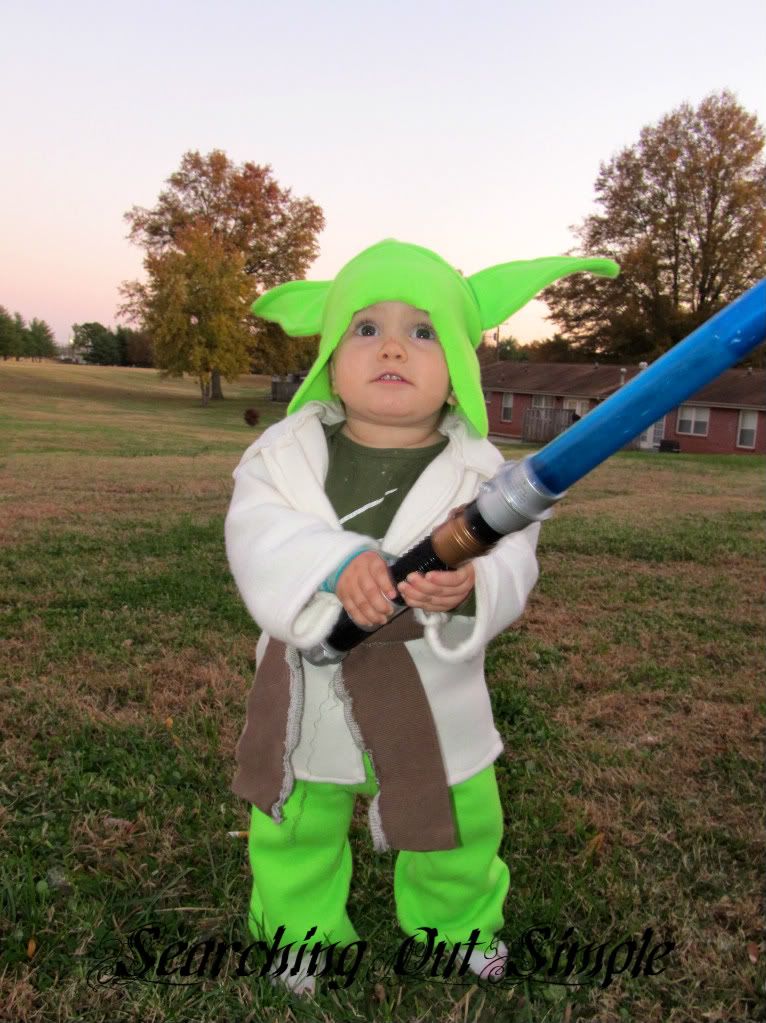
We all decided that Yoda would be the perfect costume for Delilah. I know she's not a 900 year old man {what is Yoda anyway?} or even a boy but she loves to chase her brother and sister around the house with a light saber so it was meant to be. Being the procrastinator that I am I bought the fabric the day of and whipped up her costume. I used this tutorial for her hat but added the ears, can't have Yoda without the ears right? I winged the pants and robe using clothes of hers as a sizing guide. I plan on jazzing up the coat a bit so she can wear it out.

They had a fun night, lots of people liked their costumes and they brought {me} home lots of candy. Now it's November and I have turkey and pumpkin pie on the brain.

Thanks for visiting!
Related Posts Plugin for WordPress, Blogger...