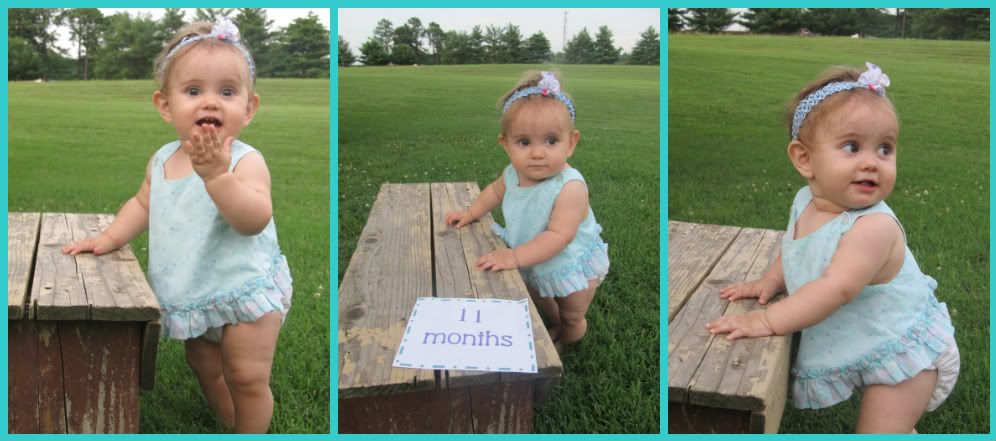
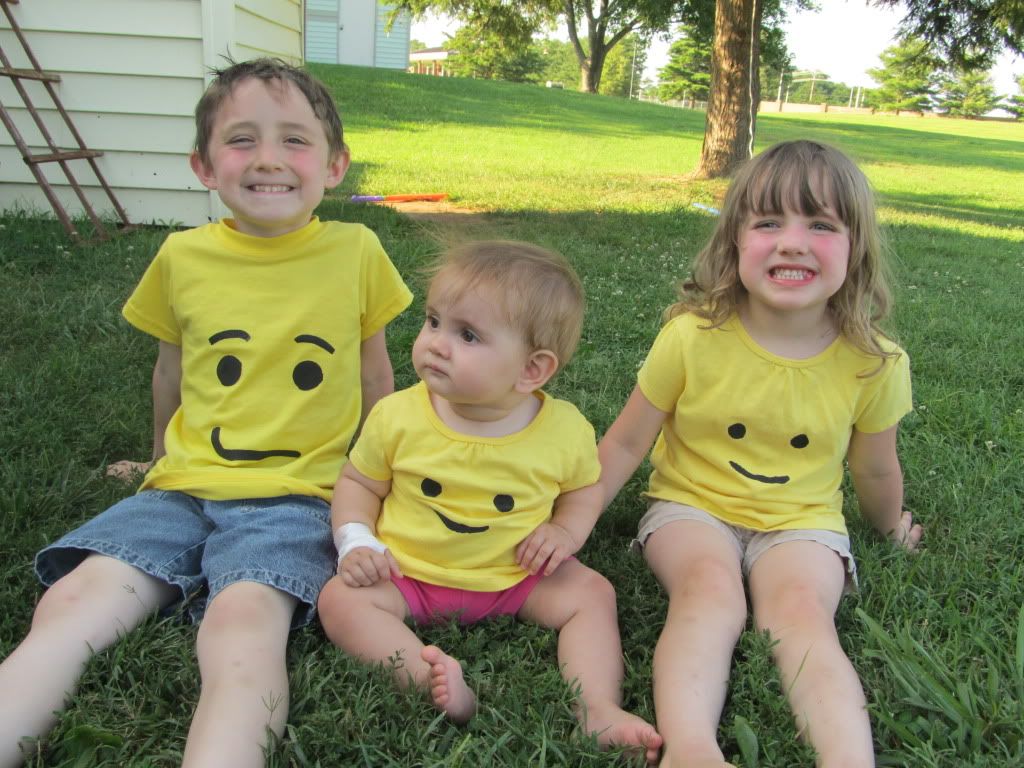
I thought I should share Delila's 11 month photos before sharing her one year cake smash pictures and birthday party. These were taken over a month ago. She now stands more often without support, still not walking. Though daddy says she took steps to him twice it hasn't been consistent. At 11 mos she was still saying mama & dada, 'aboo' for peekaboo and calling everything mama, including dada. She was eating pretty much everything we did but in smaller bites and would literally scream for ice-cream and popsicles. Big brother & sister are her best playmates. She knows when she's doing something funny and makes a pirate/poker face on purpose for the camera. She's also a sweetheart and a snuggler. <3 <3 <3
Sunday, July 31, 2011
Monday, July 25, 2011
Celebrating SEVEN with Legos {and water play}
My oldest child turned 7 this month. SEVEN. Holy cow. I may have mentioned this when I posted about his invitations but I still can't believe I have a seven year old. It still seems like yesterday he was holding his tiny hand around my finger and I was in awe of the love I had for him and completely scared out of my mind at the realization that I was a mother now. While I miss my little baby, really 2 was my most favorite age with him, I love watching him grow and learn and he still amazes me. And some days I'm still surprised that I'm a mom and all that that entails.
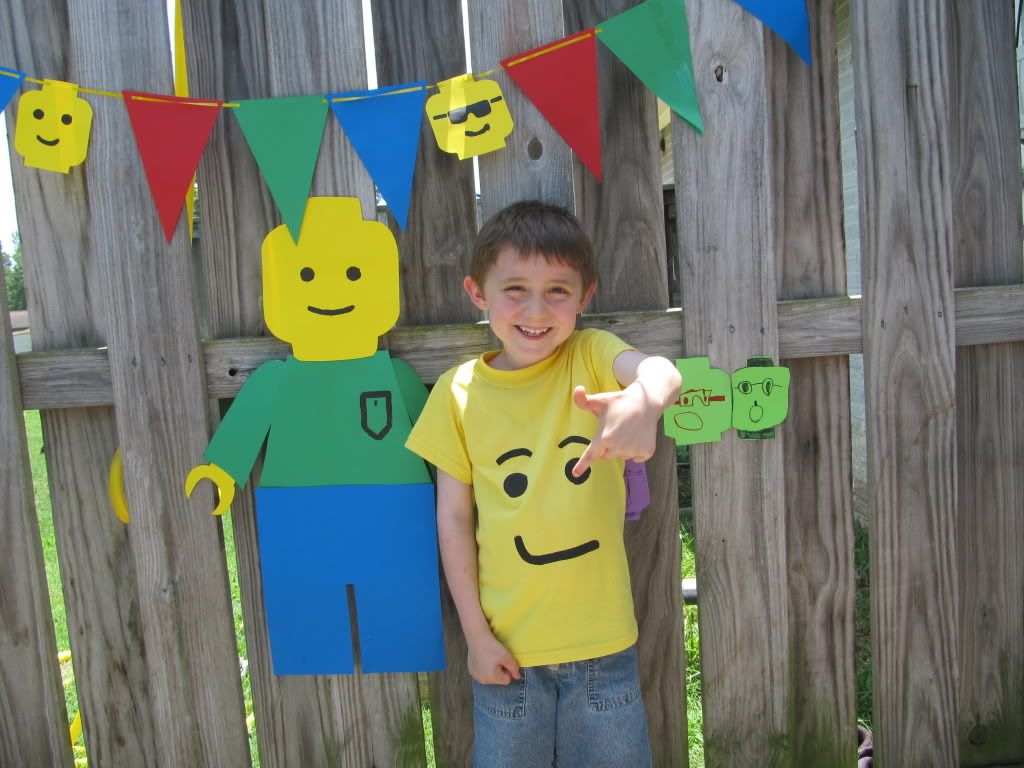
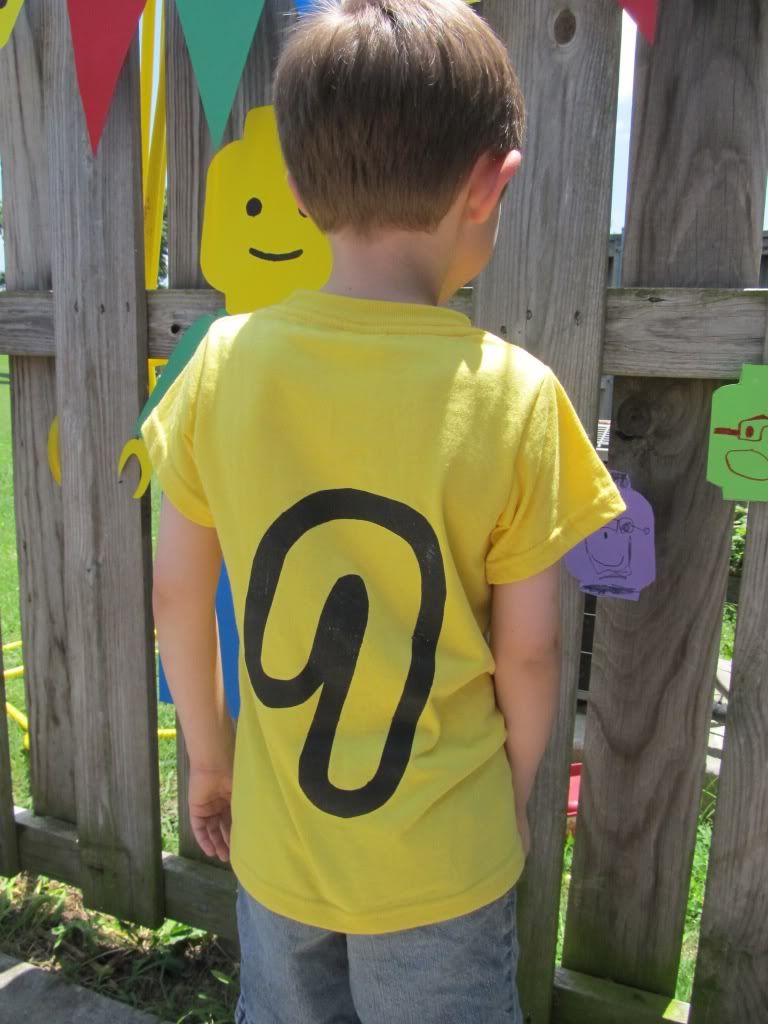
I made a Lego banner by tracing a Lego head image onto yellow cardstock and painted faces on, he liked the sunglasses ones the best. I got the idea for the banner here. I also freezer paper stenciled his shirt to have a Lego man face on the front and used a Lego font I downloaded to make the 7 on the back. The same day I made the banner the kids made the green and purple Lego faces. More about the big Lego man in a minute.
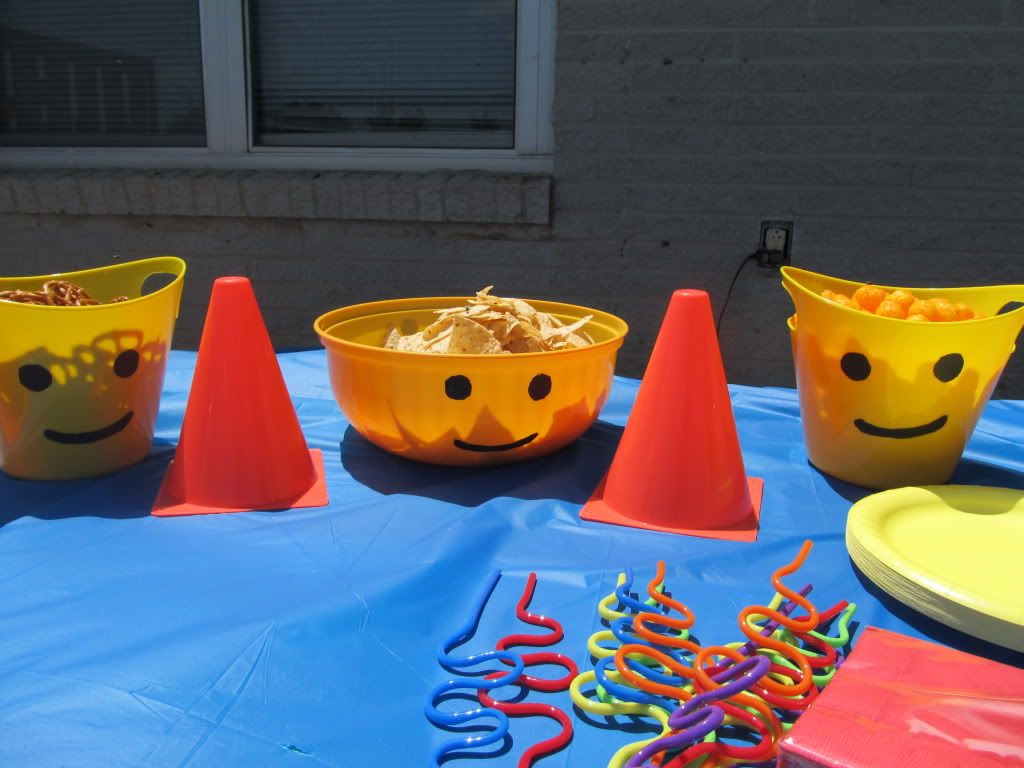
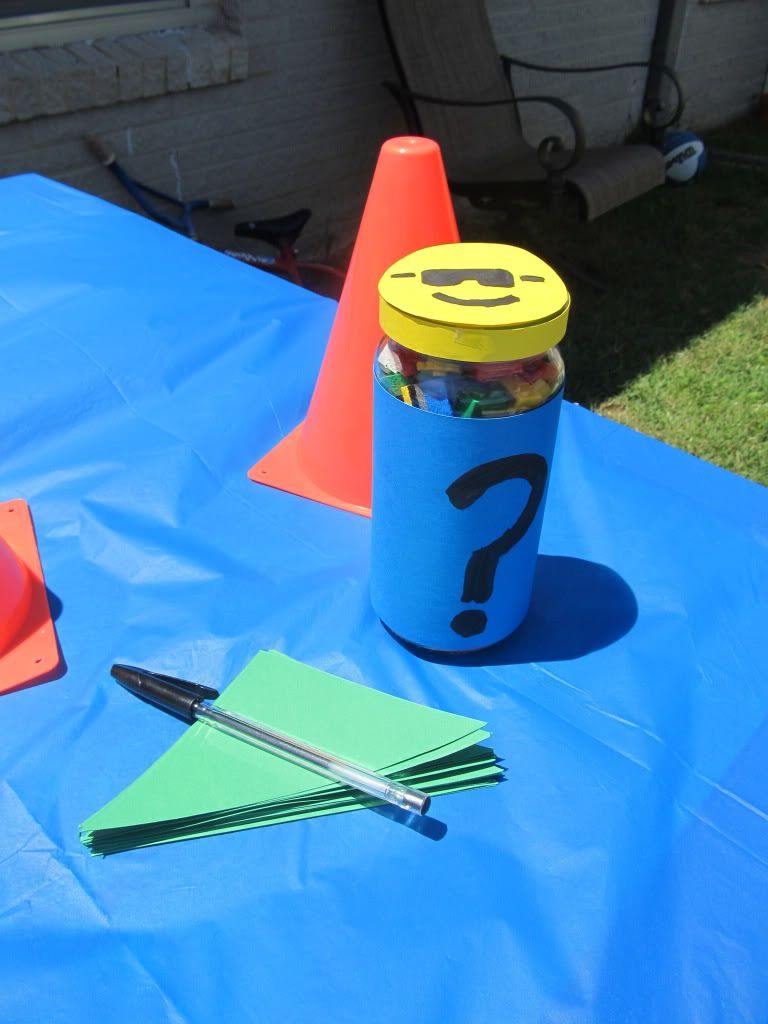
I found a big yellow bowl and yellow buckets at the Target dollar aisle, painted faces on {the black acrylic paint washed right off}, had red and yellow plates, cups and napkins and got two packs of crazy straws from the dollar store. The construction cones were $2.50 at the Target dollar aisle and the kids can use them for outdoor play and with their cars and things so it's double use. Using an empty pepperoncini jar, legos and cardstock we had a 'guess how many Legos are in the jar game' with a prize for the winner. There were more snacks but we kept it indoors because a couple hundred flies think my backyard is their home.
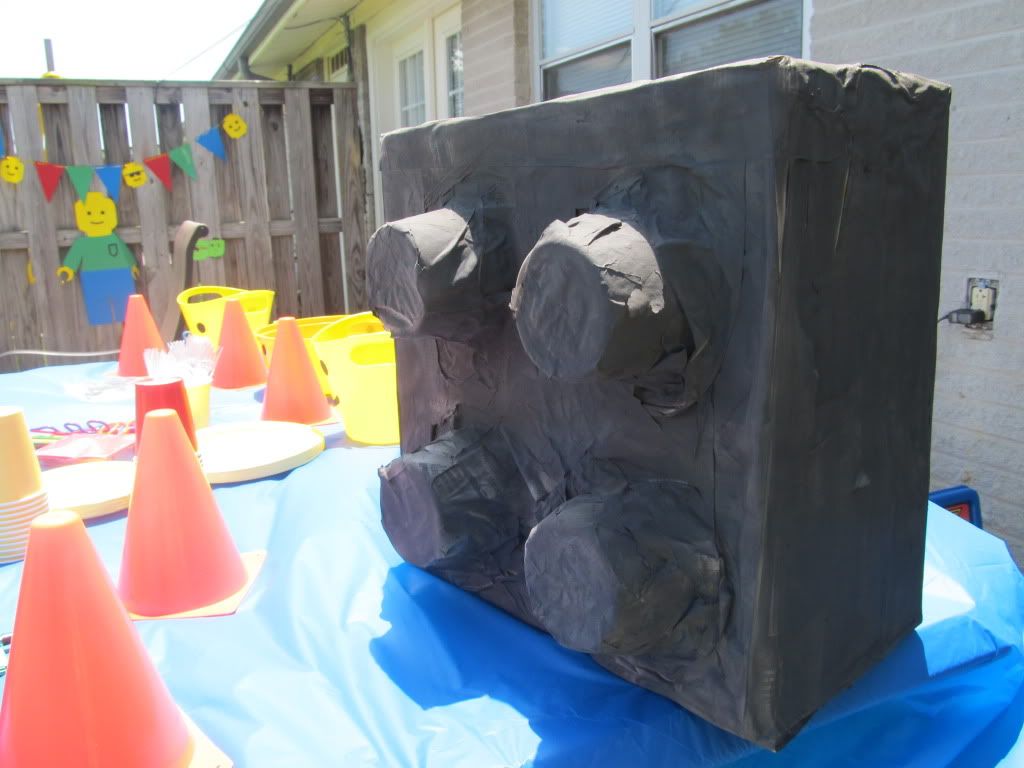
Using this tutorial I made a Lego block pinata, it was a big hit. I filled it with sandwich bags of candy, kids were happy. It was easy enough but paper mache takes a hot forever to dry so do yours several days in advance. Also, newspaper soaks up paint like nothing so you may need more than one can to get you covered.
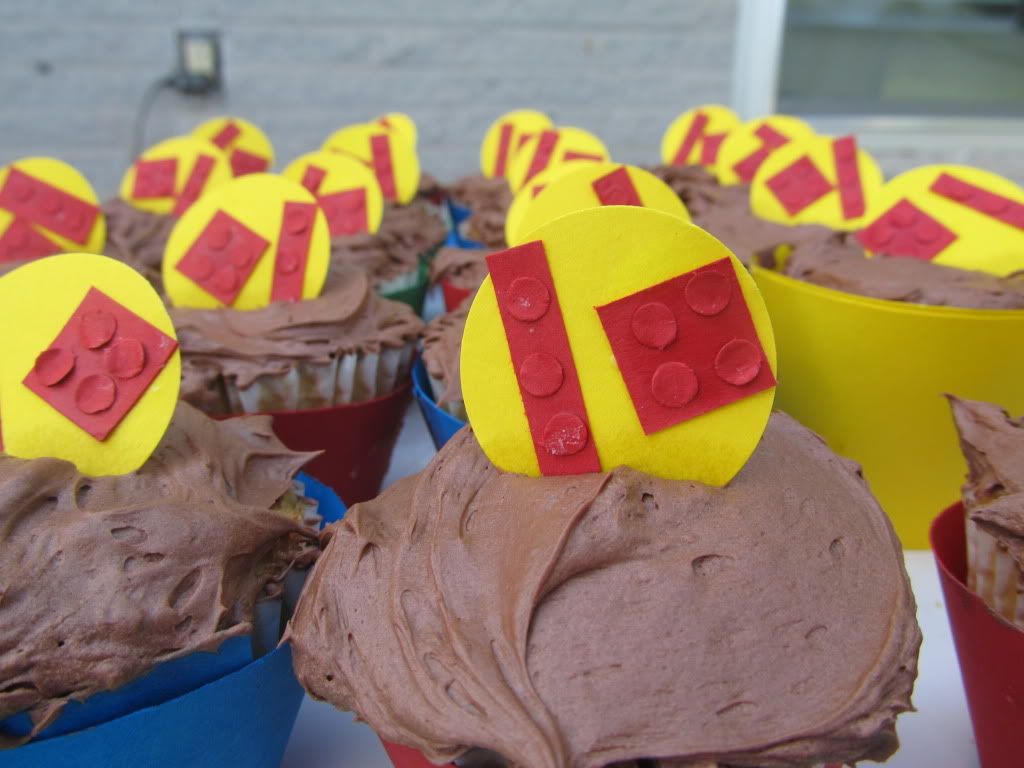
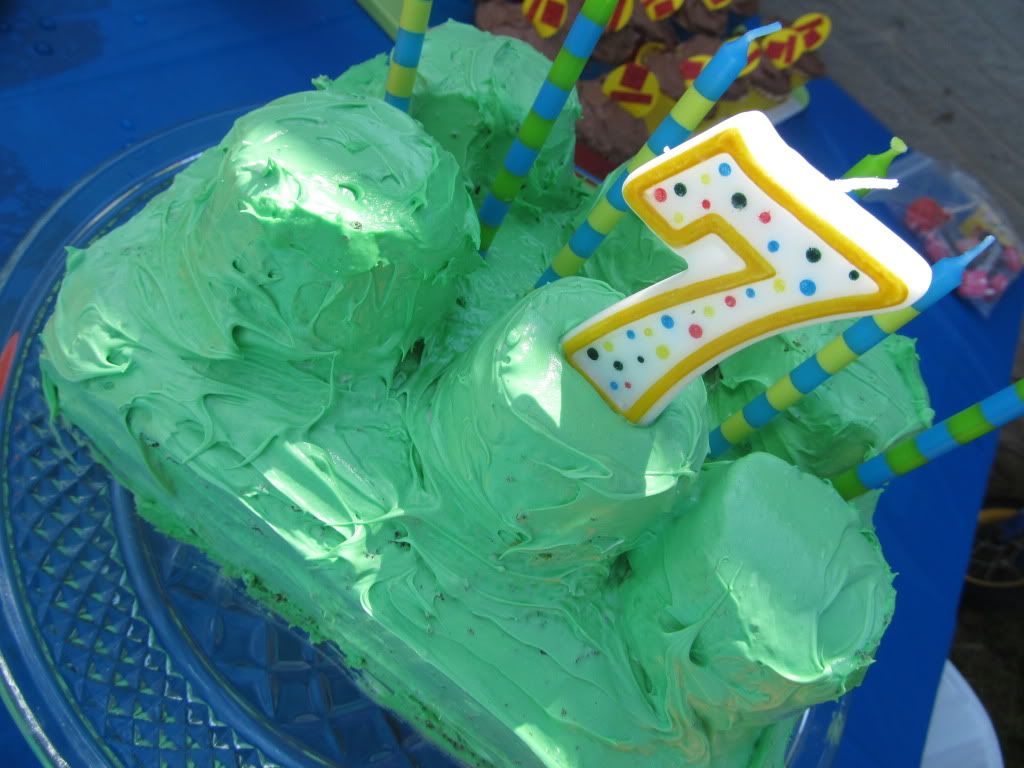
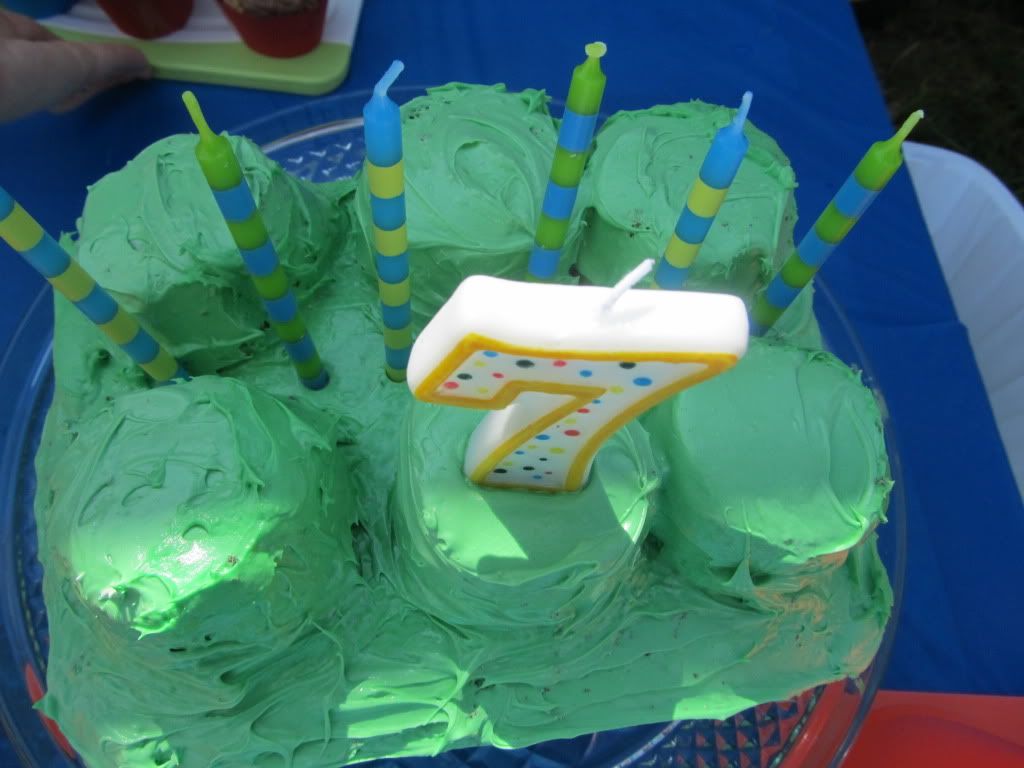

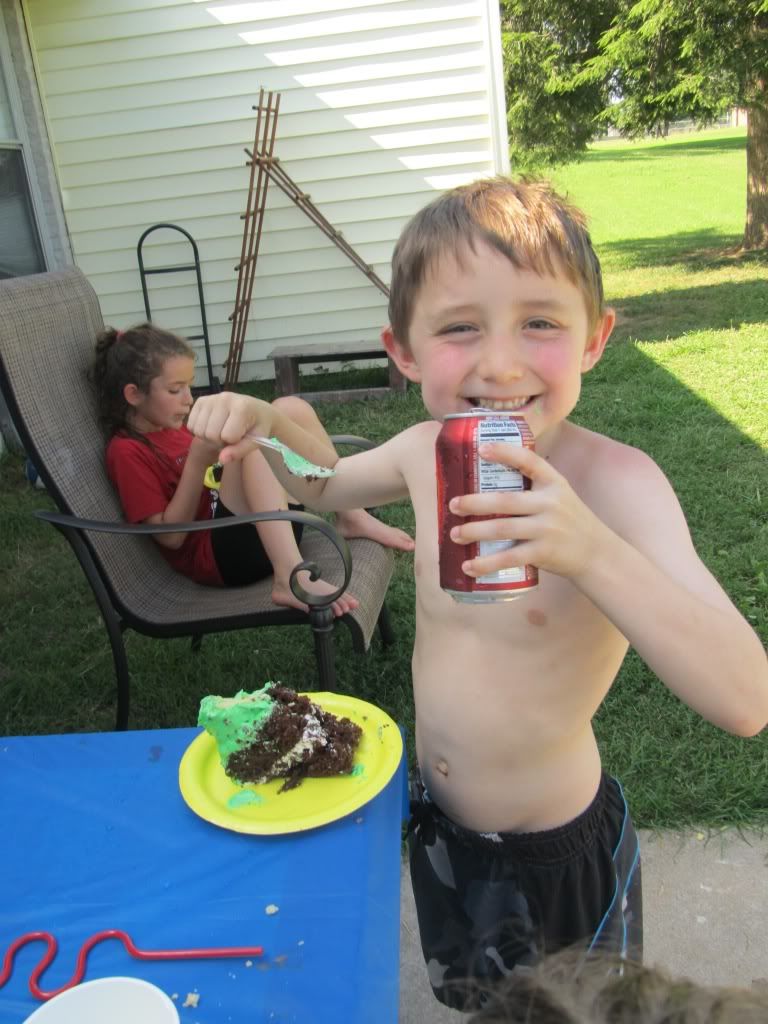
I made a Lego block cake, using half of a 9x13 cake and 6 cupcakes, lined up 6 blue & green candles in the middle and a number 7 front and center. The rest of the cupcakes were frosted and I put them in cupcake wrappers and finished them up with the toppers I made, a three block and a four block because 3+4=7. Cheesy? Maybe.
The last two years he wanted a Transformers themed party so when he requested Legos I was excited - yay, something new! He still LOVES all things Transformers but like most boys his age, enjoys Legos too.
Here were his invitations
We invited 10 boys from his class two months before the party. I knew it was risky because we had no contact information for any of them and I know how papers can get lost in the shuffle, especially at the end of the school year. So I gave him the choice - invite only boys from class and no one may come or he could invite a few girls we could get in touch with. He chose boys only, three rsvp'd no and the rest didn't rsvp or show up. Fortunately we had a new neighbor move in with a boy the same age and my dad and family (5 kids) just happened to be driving back home from a trip and we were {mostly} on their way home so the party wasn't a bust.
Onto the party!
I made a Lego banner by tracing a Lego head image onto yellow cardstock and painted faces on, he liked the sunglasses ones the best. I got the idea for the banner here. I also freezer paper stenciled his shirt to have a Lego man face on the front and used a Lego font I downloaded to make the 7 on the back. The same day I made the banner the kids made the green and purple Lego faces. More about the big Lego man in a minute.
I found a big yellow bowl and yellow buckets at the Target dollar aisle, painted faces on {the black acrylic paint washed right off}, had red and yellow plates, cups and napkins and got two packs of crazy straws from the dollar store. The construction cones were $2.50 at the Target dollar aisle and the kids can use them for outdoor play and with their cars and things so it's double use. Using an empty pepperoncini jar, legos and cardstock we had a 'guess how many Legos are in the jar game' with a prize for the winner. There were more snacks but we kept it indoors because a couple hundred flies think my backyard is their home.
Using this tutorial I made a Lego block pinata, it was a big hit. I filled it with sandwich bags of candy, kids were happy. It was easy enough but paper mache takes a hot forever to dry so do yours several days in advance. Also, newspaper soaks up paint like nothing so you may need more than one can to get you covered.
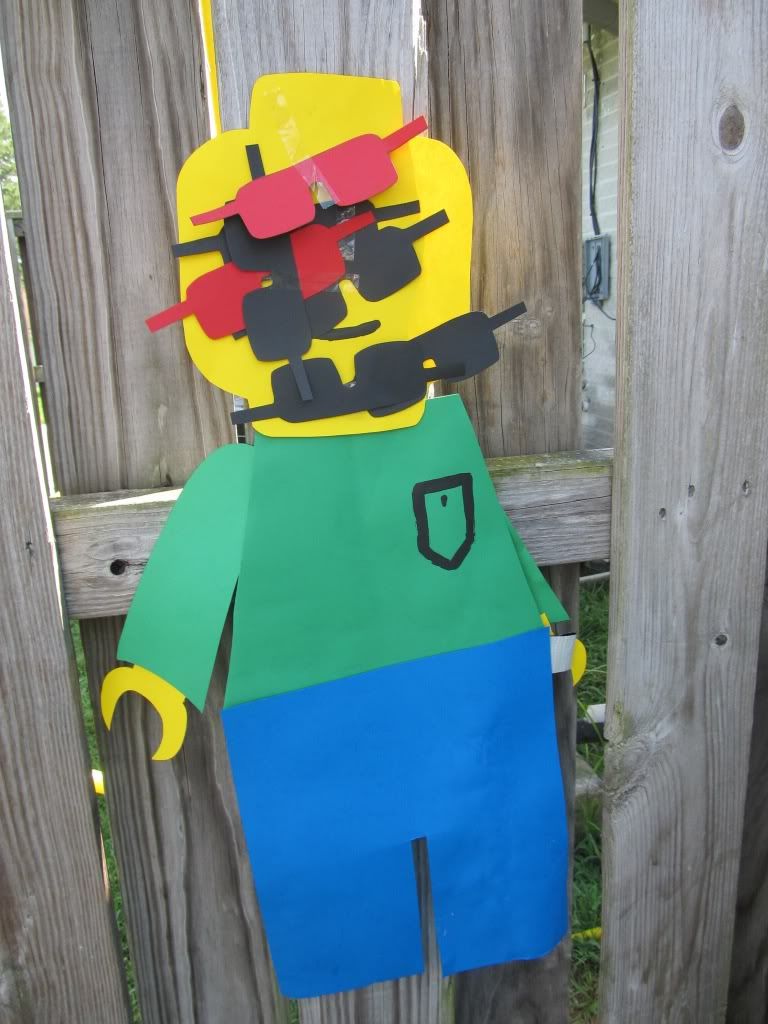
I got the idea to make a Lego man from this blog but made it into a 'pin the sunglasses on the Lego man' game. Think the kids figured out how to find the Lego face? ;)


I made a Lego block cake, using half of a 9x13 cake and 6 cupcakes, lined up 6 blue & green candles in the middle and a number 7 front and center. The rest of the cupcakes were frosted and I put them in cupcake wrappers and finished them up with the toppers I made, a three block and a four block because 3+4=7. Cheesy? Maybe.
Friday, July 15, 2011
Button Down to Dress
Hello, hello...is this thing on? After nearly a month of not really posting I'm finally back! I have many photos to edit and posts to write but for now I'll share my guest post from the Button Down Rehab series with Jen @ My Own Road for now. Enjoy your weekend!
I was so excited about Jen's BDR series and flattered that she asked me to guest post. My dress is somewhat inspired by a drop waist dress I saw at the store and thought "hey, I could make that for less than $5". I love a challenge. I hope my tutorial inspires even the beginning seamstress, that with enough determination {and maybe a few choice words} you can see a vision come to life and learn some lessons along the way.
*Disclaimer* I am still fairly new at making clothing. I have a lot to learn about clothing construction and this did not turn out to be a drop waist dress.
Supplies
* button down shirt {I used a short sleeve my husband didn't want}
* coordinating thread
* white or coordinating color cotton {1/4 should be enough}
* extra buttons {optional}
Step 1
First I put my trusty seam ripper to work and removed the sleeves, collar and pocket from the shirt. Set those pieces aside, you'll use some later. Fold what's left of the shirt in half and place a dress that fits on top, also folded in half. Trace around the dress leaving room for seam allowance. I believe most people use 5/8" seam allowance.
Step 2
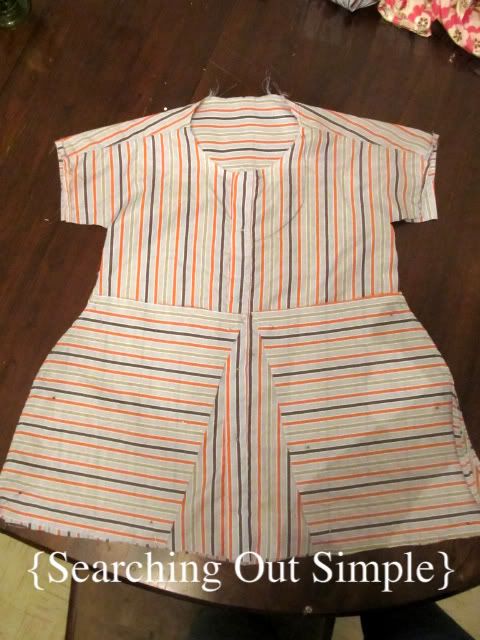
Put right sides of dress together {I didn't cut the top of the sleeve so I just folded the dress in half at the shoulder with right sides facing). Fold the bottom of dress 1/4" two times to create new hem, press, pin and sew. {Ignore the horizontal stripe pieces shown here, this was an idea that didn't work out}. Do the same thing on the sleeves to hem. Then sew from the edge of sleeve to the bottom of dress on both sides.
Step 3
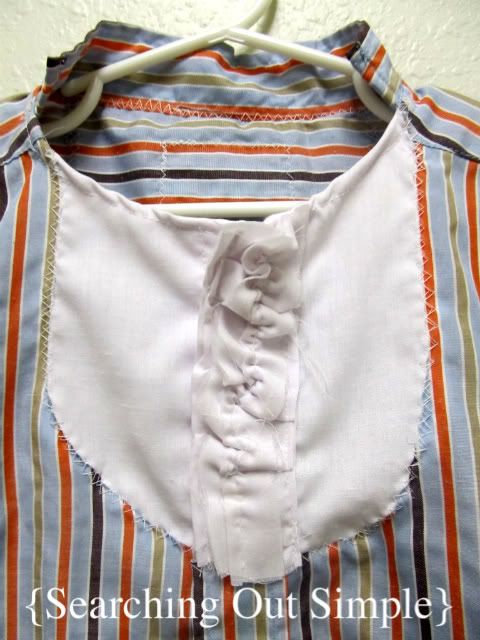
To create the bib I referred to this tutorial. Instead of one piece of white cotton I had two pieces so it could still button up to put on and take off. My pieces were 8"x12" with two inches for the button up center. I accidentally sewed my button hole to the inside piece instead of the outer piece so this dress buttons backwards on the top and I sewed a white ruffle to the top. As you can see, I wasn't very careful while cutting the bib shape, I thought I could cut it folded in half but it didn't come out evenly. Definitely trace a round object and cut along your line. I attached the bib to the button down like sewing an applique, next time I'd like to try a cleaner method.
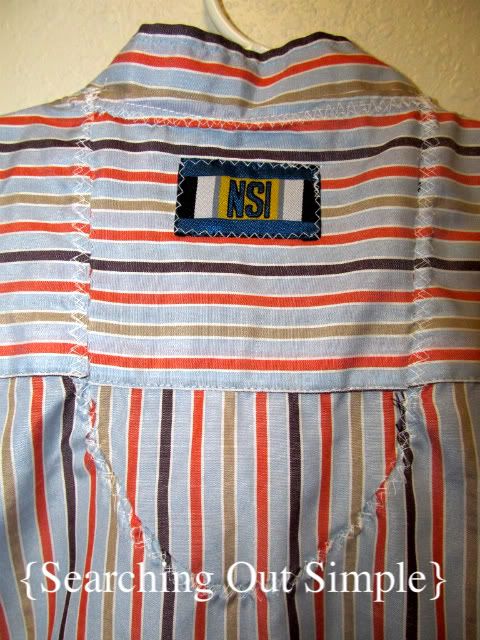
The second picture shows a lesson learned. If you're sewing past your bedtime triple check what you're doing before cutting fabric. I accidentally cut the back of the shirt while cutting the front for the bib. I pieced it back together and later sewed the tag that was on the inside to the outside, I thought it was something unexpected.
Step 4
The dress was fine without a collar but seemed a little unfinished. So I hemmed the rest of the old collar and sewed it to the inside of the neckline with a zig zag stitch, about 1/4" overlapping.
Step 7
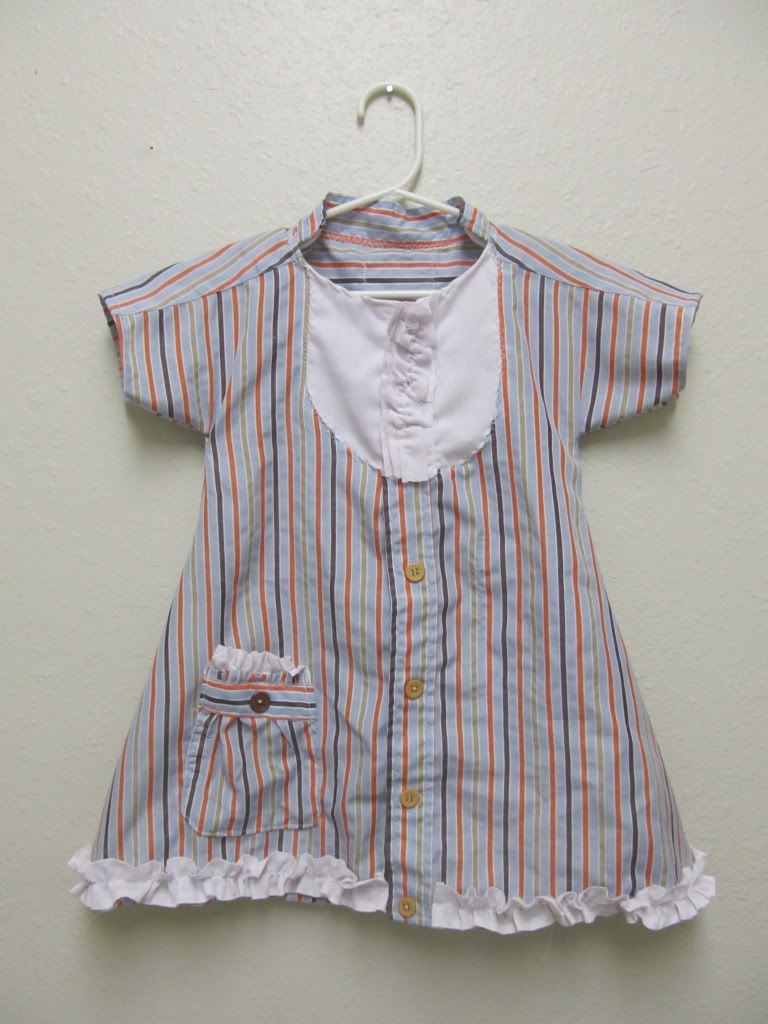
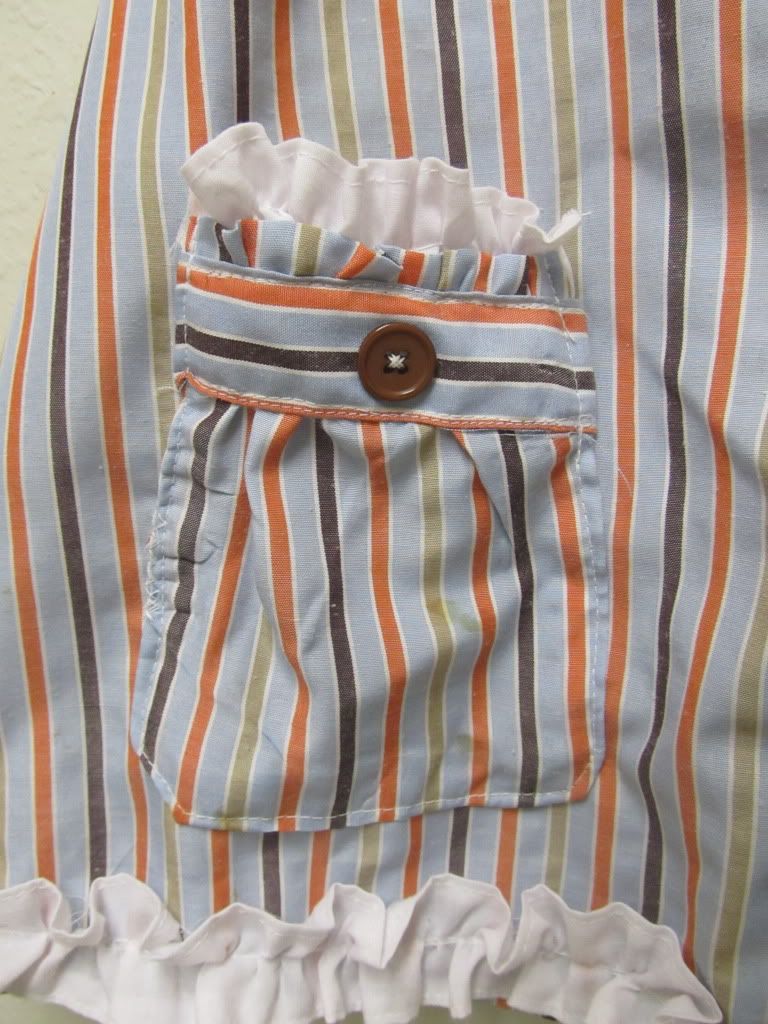
I don't have pictures showing this step but I replaced all of the original buttons on this shirt. They were originally a shiny off white. My daughter chose tan for the buttons on the stripes, blue for the white {backwards} and I put a brown one on the pocket.
And there you have it
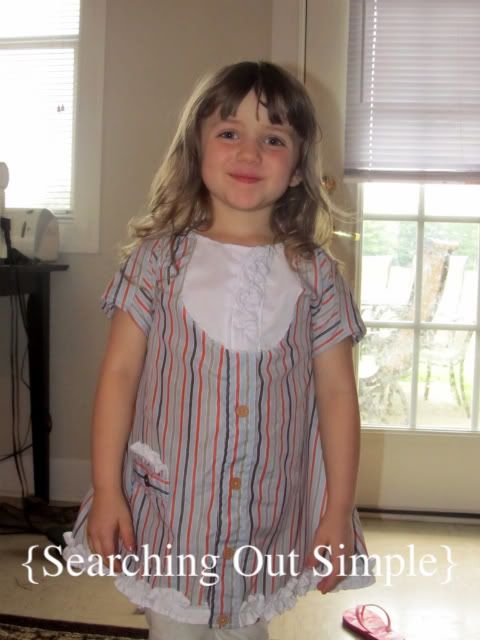
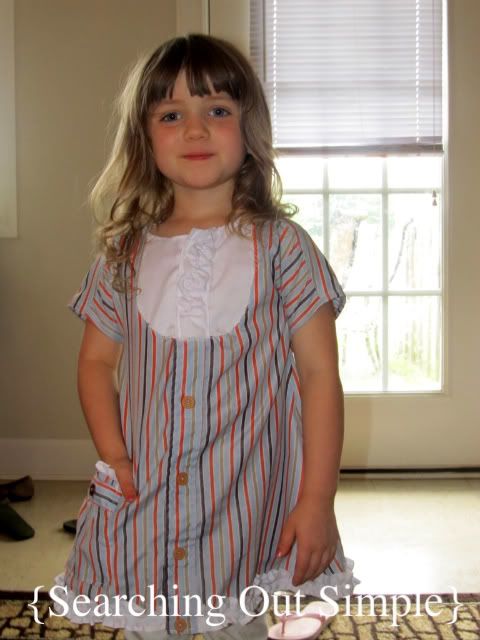
I was so excited about Jen's BDR series and flattered that she asked me to guest post. My dress is somewhat inspired by a drop waist dress I saw at the store and thought "hey, I could make that for less than $5". I love a challenge. I hope my tutorial inspires even the beginning seamstress, that with enough determination {and maybe a few choice words} you can see a vision come to life and learn some lessons along the way.
*Disclaimer* I am still fairly new at making clothing. I have a lot to learn about clothing construction and this did not turn out to be a drop waist dress.
Supplies
* button down shirt {I used a short sleeve my husband didn't want}
* coordinating thread
* white or coordinating color cotton {1/4 should be enough}
* extra buttons {optional}
Step 1
First I put my trusty seam ripper to work and removed the sleeves, collar and pocket from the shirt. Set those pieces aside, you'll use some later. Fold what's left of the shirt in half and place a dress that fits on top, also folded in half. Trace around the dress leaving room for seam allowance. I believe most people use 5/8" seam allowance.
Step 2
Put right sides of dress together {I didn't cut the top of the sleeve so I just folded the dress in half at the shoulder with right sides facing). Fold the bottom of dress 1/4" two times to create new hem, press, pin and sew. {Ignore the horizontal stripe pieces shown here, this was an idea that didn't work out}. Do the same thing on the sleeves to hem. Then sew from the edge of sleeve to the bottom of dress on both sides.
Step 3
To create the bib I referred to this tutorial. Instead of one piece of white cotton I had two pieces so it could still button up to put on and take off. My pieces were 8"x12" with two inches for the button up center. I accidentally sewed my button hole to the inside piece instead of the outer piece so this dress buttons backwards on the top and I sewed a white ruffle to the top. As you can see, I wasn't very careful while cutting the bib shape, I thought I could cut it folded in half but it didn't come out evenly. Definitely trace a round object and cut along your line. I attached the bib to the button down like sewing an applique, next time I'd like to try a cleaner method.
The second picture shows a lesson learned. If you're sewing past your bedtime triple check what you're doing before cutting fabric. I accidentally cut the back of the shirt while cutting the front for the bib. I pieced it back together and later sewed the tag that was on the inside to the outside, I thought it was something unexpected.
Step 4
Next came the ruffle at the bottom. I used two pieces of white cotton measuring 2" x twice the width of the dress bottom. I pressed & sewed a 1/4" hem on both sides of the strips then created the ruffle by sewing down the middle of each strip with my tension at the tightest setting and stitch length at the longest. Next, pin the first ruffle strip starting at one side of the front with the bottom of the ruffle lining up with the hem. Continue pinning the second ruffle overlapping slightly in the back and finishing up at the other side of the front.
Step 5
Add a pocket! That pocket you set to the side before can be made new again. I made a gathered pocket method I've used before using this tutorial and put a piece of the collar along the top and some extra ruffle strip.
Step 6
Step 6
The dress was fine without a collar but seemed a little unfinished. So I hemmed the rest of the old collar and sewed it to the inside of the neckline with a zig zag stitch, about 1/4" overlapping.
Step 7
I don't have pictures showing this step but I replaced all of the original buttons on this shirt. They were originally a shiny off white. My daughter chose tan for the buttons on the stripes, blue for the white {backwards} and I put a brown one on the pocket.
And there you have it


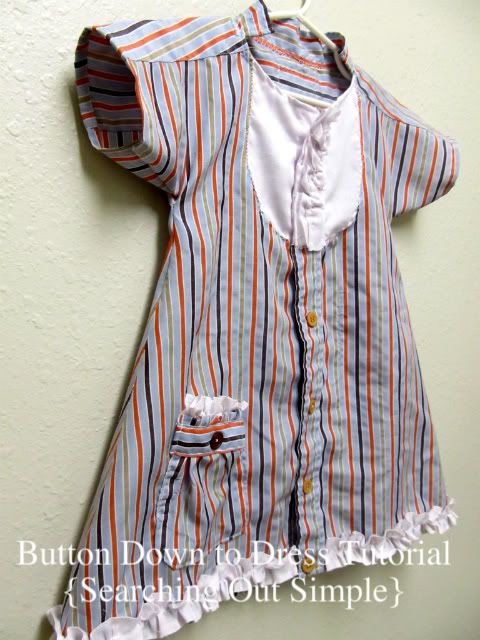
A button down turned dress with a crooked bib, backward buttons, ruffle trim, functioning pocket and little collar. I would still like to add a little button and finishing technique that Jen shared on day 4 of BDR to the sleeves and maybe a little elastic in the back to hold it's shape better but those will have to wait.
I really do love how this dress turned out, though during the process it was one of those things that makes me want to poke myself with a needle in the eye. If you make a dress using this tutorial I'd love to see the finished product! Thank you for having me Jen!
Subscribe to:
Comments (Atom)
