
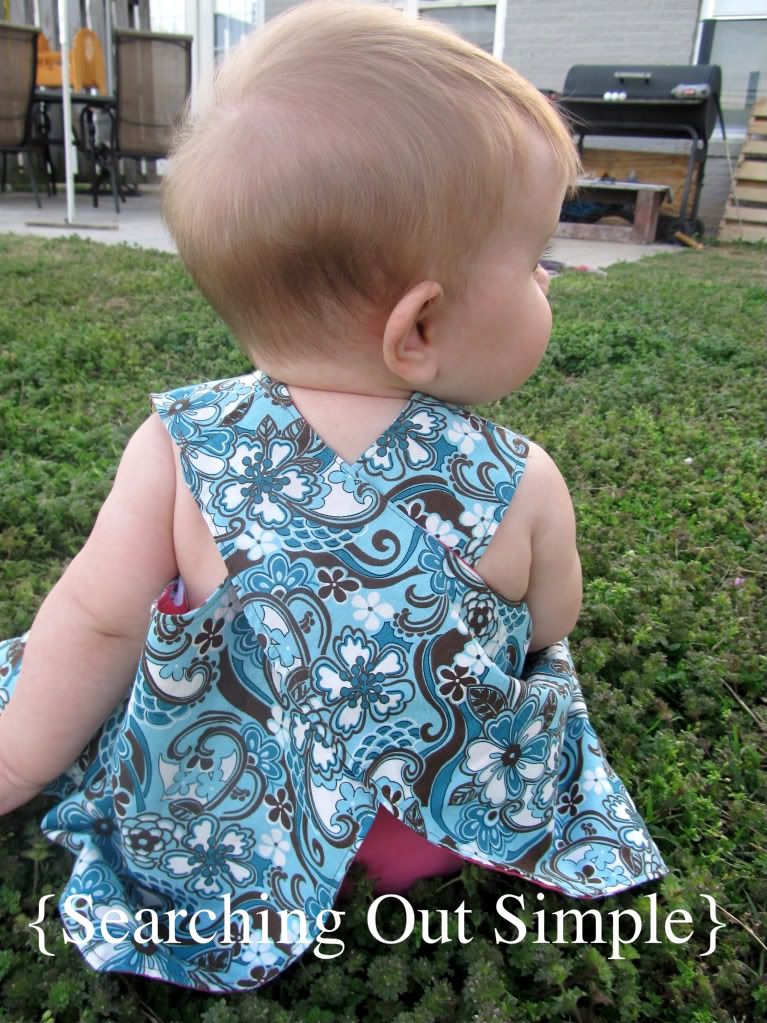
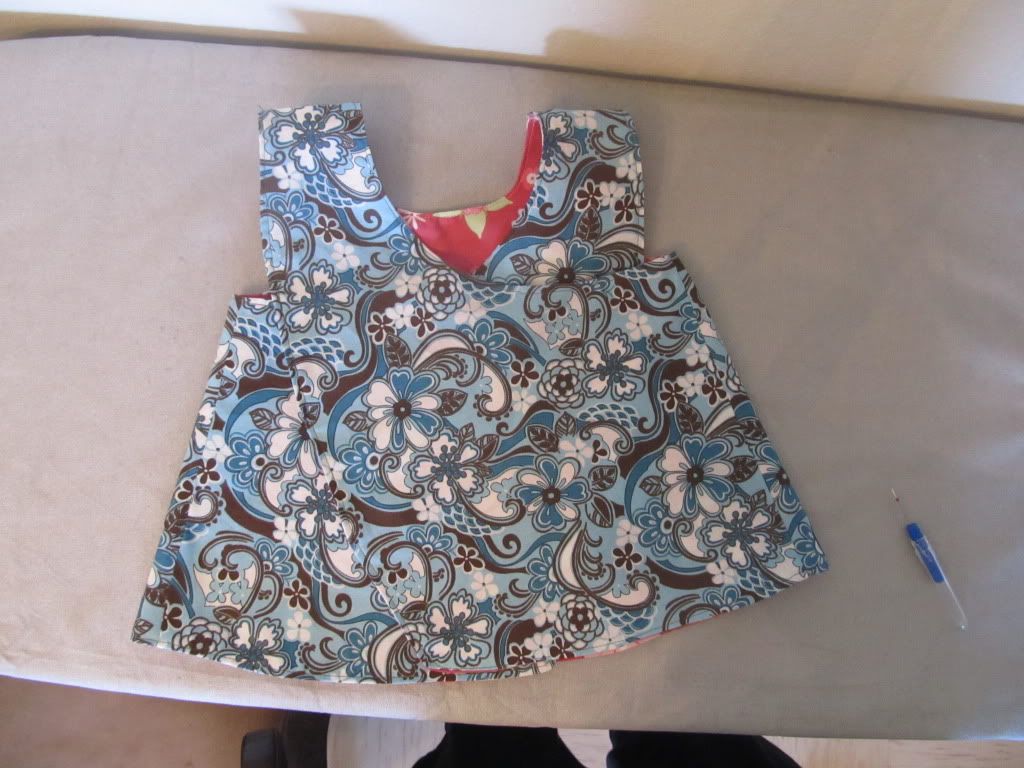
I shared some pictures of the first pinafore I made over here. I love putting my daughter in a little pinny with this warm weather spring has brought. It's lightweight, airy and can still show off her fluff. I need to make her a matching flower or two for her cute little head. A bonnet would be fun too.
Honestly, I'm a little nervous writing this up because it is my first sewing tutorial. {Ack!} I've tried to make this as 'goof proof' as possible and hope that a beginner would feel confident making something like this. Because they totally can. If there's a step that isn't clearly written out or a picture for a step missing please tell me so I can edit, clarify and add pictures where necessary. Thank you! :)
Honestly, I'm a little nervous writing this up because it is my first sewing tutorial. {Ack!} I've tried to make this as 'goof proof' as possible and hope that a beginner would feel confident making something like this. Because they totally can. If there's a step that isn't clearly written out or a picture for a step missing please tell me so I can edit, clarify and add pictures where necessary. Thank you! :)
Gather Supplies


Cut List
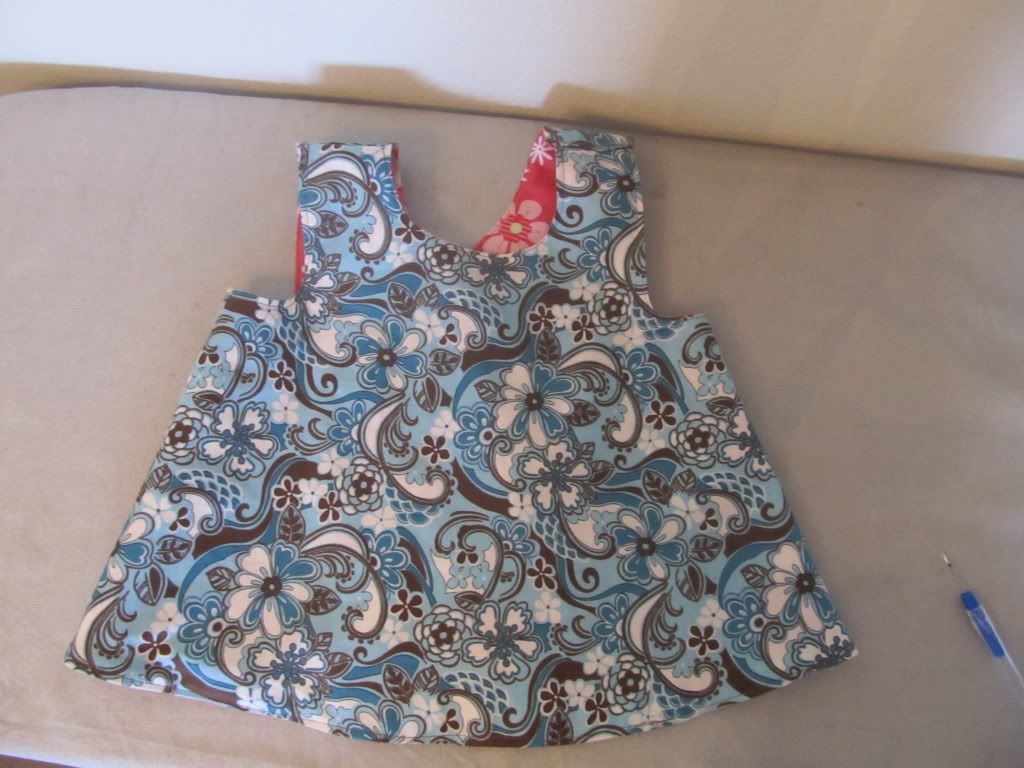
1 each pieces A, B & C on two fabrics. If you don't want this to be reversible I would still line the pinafore with muslin or another inexpensive fabric.
Assembling
1. Lay your pieces of like fabric right sides together, lining up side hems & shoulders.
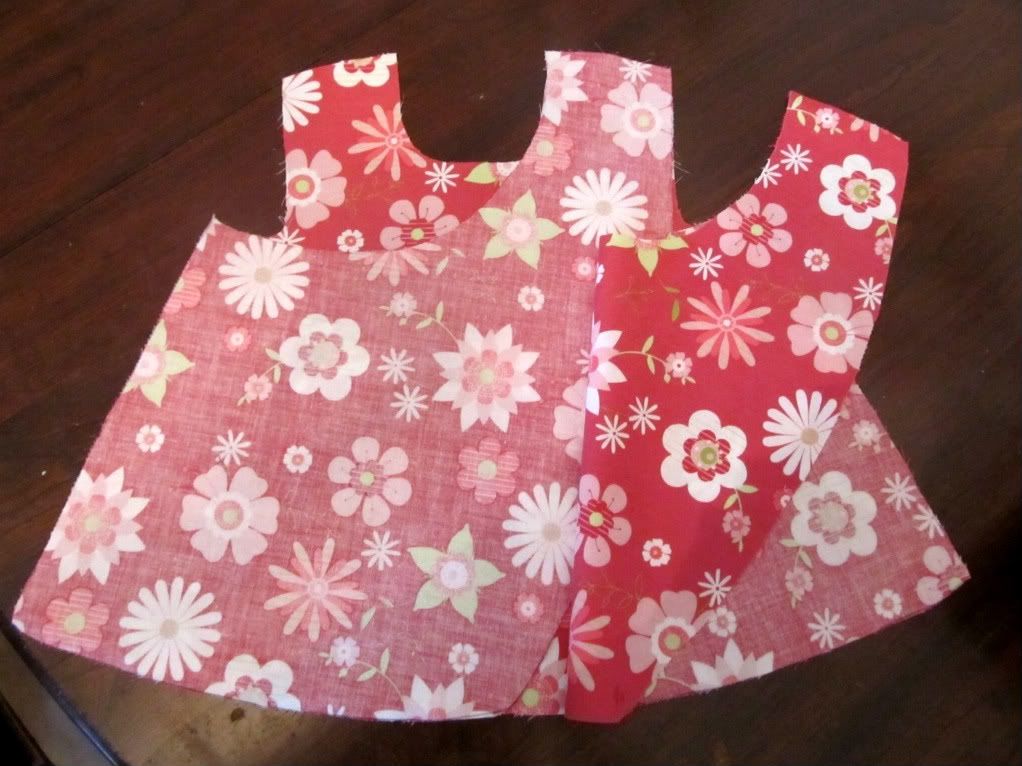
Pin both sides together & sew with a 1/4" seam. Remember to back tack at the top & bottom. Do this for both fabric sets.

4. Now it's all sewn together and pins are removed it's time to trim up a couple seams and turn right side out. I like to trim the neck and curves on the inside of straps {B&C}. If you don't trim the seam you'll want to make small cuts {careful not to cut your seam!} at the curves. Either options gives less bulk after it's turned and I think a nicer finish. To turn simply reach in at the bottom and start pulling the fabric out. I like to use a chop stick {they come in some bags of stuffing also} to really push out the corners and curves.
5. Press! I know, again. But it really is necessary this time! Another trick to a more finished product is top-stitching. To get a good top-stitch you want to iron the piece flat, pushing out the seams. Also when you do this tuck in the bottom that you left open for turning about 1/4" so it's lined up with the rest of the piece. Don't top stitch the open end of the shoulders!
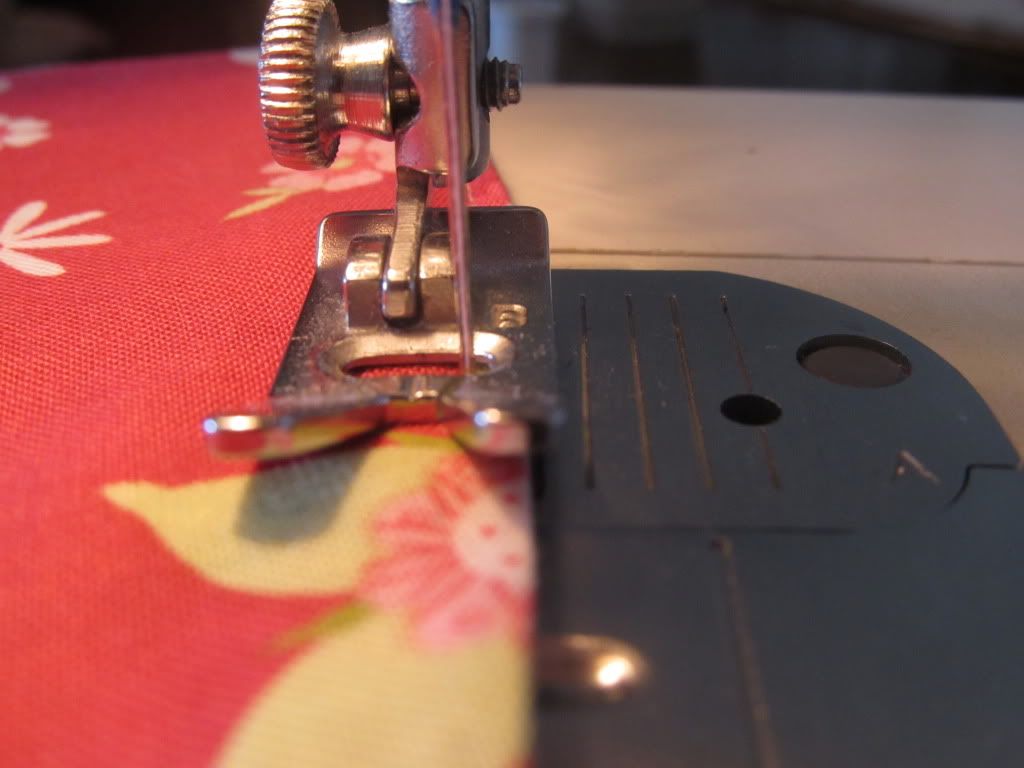
*Quick Tip! I like about 1/8" seam when I top stitch. To get this I center the edge of my fabric under the right part of my presser foot and move the needle to the right. This helps me keep a straight line. {Though I'm still practicing improving this} Your sewing machine should have a setting for this. If it doesn't then line up the fabric accordingly to the needle.
6. Now it's time to assemble the straps. My pictures are going to be opposite of what I tell you to do. I wanted to open the neck a little and doing so trimmed the shoulder piece but forgot to trim the strap piece to match so I had to tuck the shoulder into the strap instead of the strap into the shoulder. And your pieces will be the same size. Either way ends up working.

And you may want to go get more fabrics because these are just too simple and cute. I have seem variations with ruffles added across the bottom, between the fabrics, added flowers or buttons, you could embellish with ribbon or ric rac as well. I have also seen some with the straps finished and tied off {though they may need to be longer to do that}. You could also make the neck square instead of rounded.
I hope this tutorial is helpful! If you do make a pinafore using these directions I'd appreciate any feedback and would love to see your finished products!
Note: I'm not adding my "Searching Out Simple" mark on most of these photos so you can see the whole thing clearly but please don't use my pictures as your work or without giving credit. The tutorial I used to make my first pinafore is inspiration for this post but I have added more tips and all pictures are mine.
Thanks for visiting!
Linking to:

- Scissors
- Sewing machine {you could do this by hand but I'd rather poke a needle in my eye}
- Pins
- Seam Ripper {hopefully you won't need it but I always keep it handy}
- Choice of fabrics {I've used less than one yard remnants}
- Coordinating thread{s}
- Something to mark your fabric {taylor's chalk, washable marker, pencil or regular ink pen}
- Pattern {few options for this that I'll explain below}
- You can make your own pattern tracing a dress you have {remember to add for seam allowance}. I don't have a picture of this because I don't make my own patterns. If you do this I would fold the dress in half and only trace half, it's easier to get a symmetrical pattern with half a pattern & folding the fabric.
- You can purchase a store bought pattern. But if you were doing that you probably wouldn't end up reading a tutorial online would you? ;)
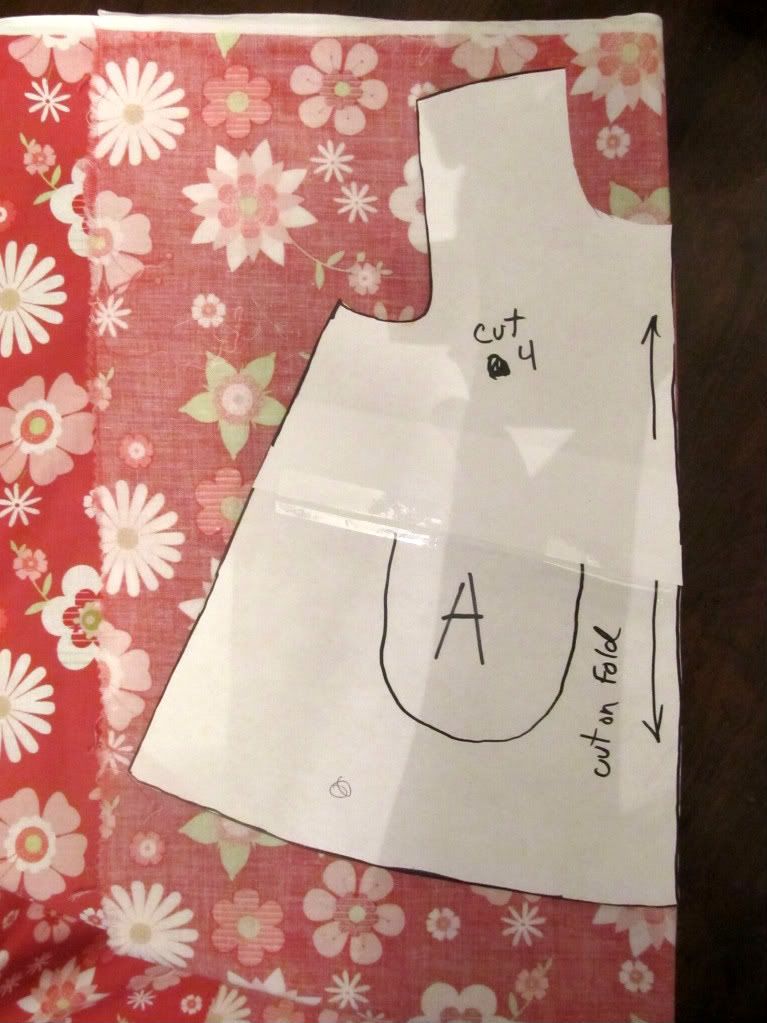
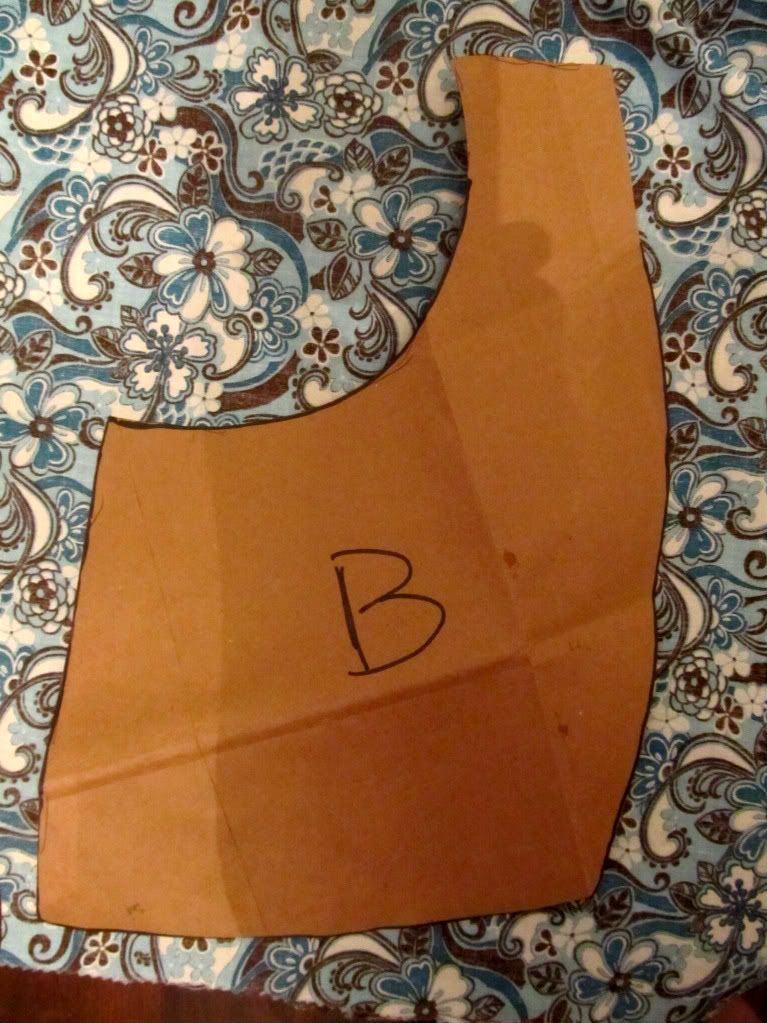
- I searched the 'net for a pinafore pattern and found this one. This pattern fits my 8 month old with room to grow, you may need to enlarge or shrink depending on the size of your child. It's from this tutorial, the back doesn't criss cross and it's not reversible but another cute option. Print the first two pages, overlap the pages to line up the lines taping together, {print the third if you want a pocket and follow their directions for adding that} and make your pattern pieces like this:


Let's pretend the fabric in the first picture is a paper bag cut to lay out flat. Fold the paper bag and lay the pattern piece on it as shown with the arrows on the fold. Then you'll open up the new paper bag pattern piece then draw & cut lines as shown in the second picture. There is play room here, it doesn't have to be exactly like mine. I like using paper bags for pattern pieces that I'm going to reuse. I can easily write on them, they don't get my hands dirty like newspaper does and I can fold them up easily.
1 each pieces A, B & C on two fabrics. If you don't want this to be reversible I would still line the pinafore with muslin or another inexpensive fabric.

Assembling
1. Lay your pieces of like fabric right sides together, lining up side hems & shoulders.
Pin both sides together & sew with a 1/4" seam. Remember to back tack at the top & bottom. Do this for both fabric sets.
*Quick Tip! If your needle is on set to the middle setting and you line the edge of your fabric with the right edge of your presser foot this will give you a 1/4" seam. Focusing on keeping the edge lined up will help keep your lines straight too, watching the needle always gives me crooked lines.
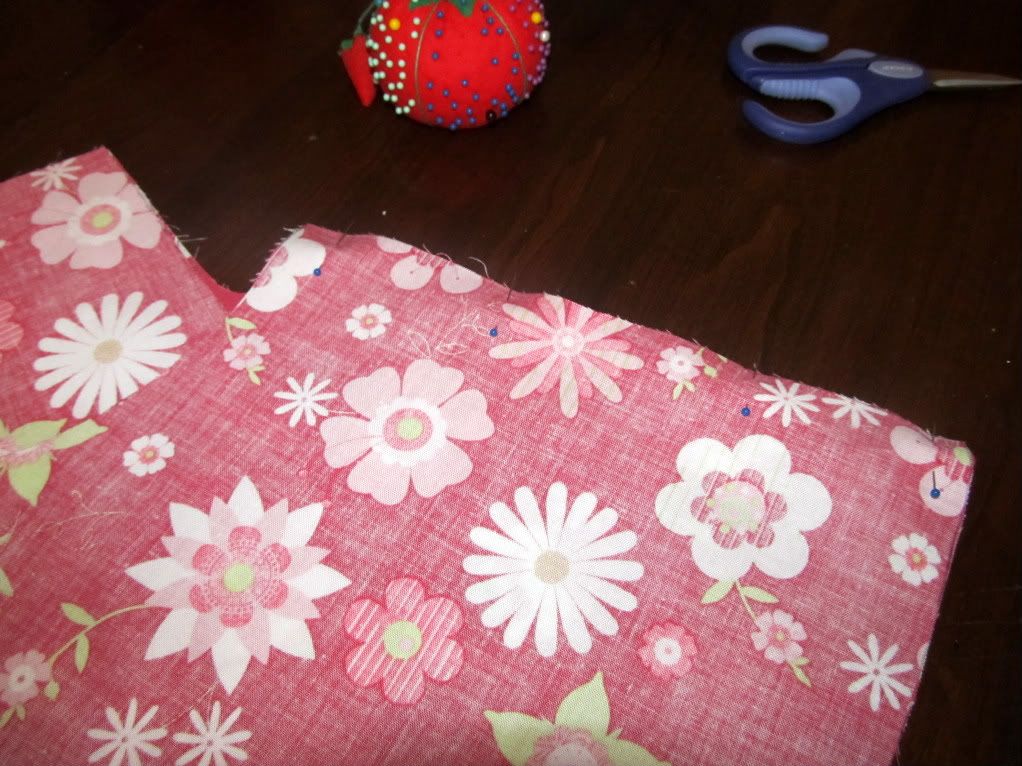
2. Press! This isn't absolutely necessary but I think it helps in having a more finished piece. And ironing can be relaxing. I press my seams opposite directions so when I line them up it's nice and flat rather than more bulky in one spot. If you iron one piece with seams facing out and the other with seams facing in they will end up lined up like this {after it's sewn and turned}.
2. Press! This isn't absolutely necessary but I think it helps in having a more finished piece. And ironing can be relaxing. I press my seams opposite directions so when I line them up it's nice and flat rather than more bulky in one spot. If you iron one piece with seams facing out and the other with seams facing in they will end up lined up like this {after it's sewn and turned}.
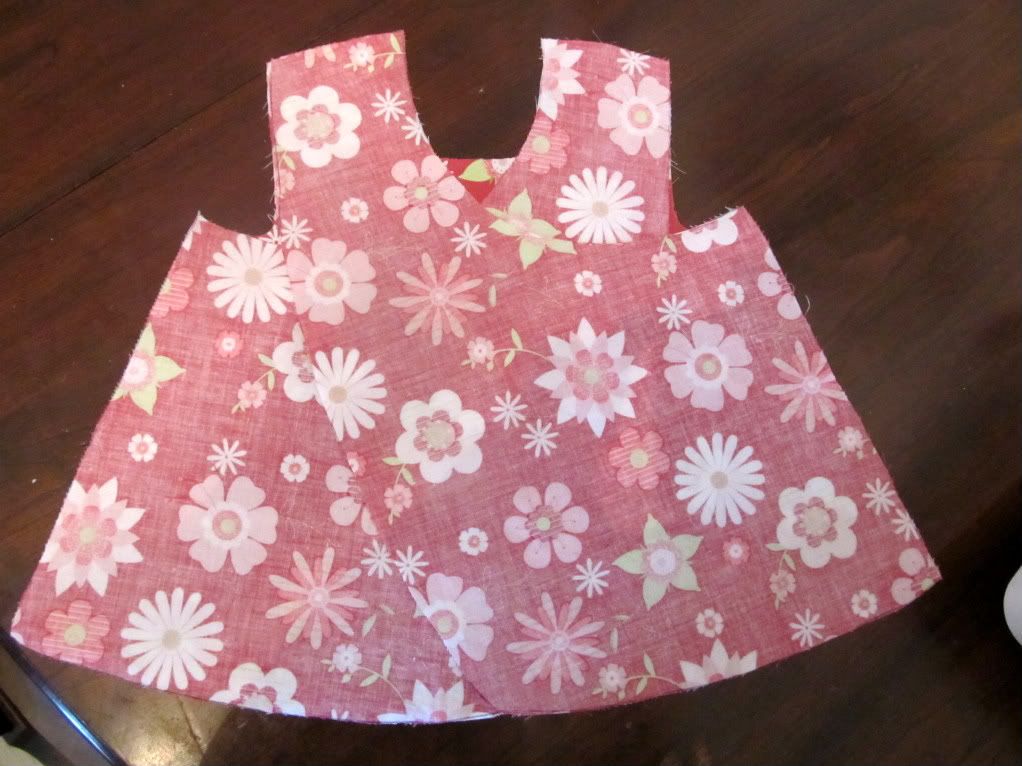
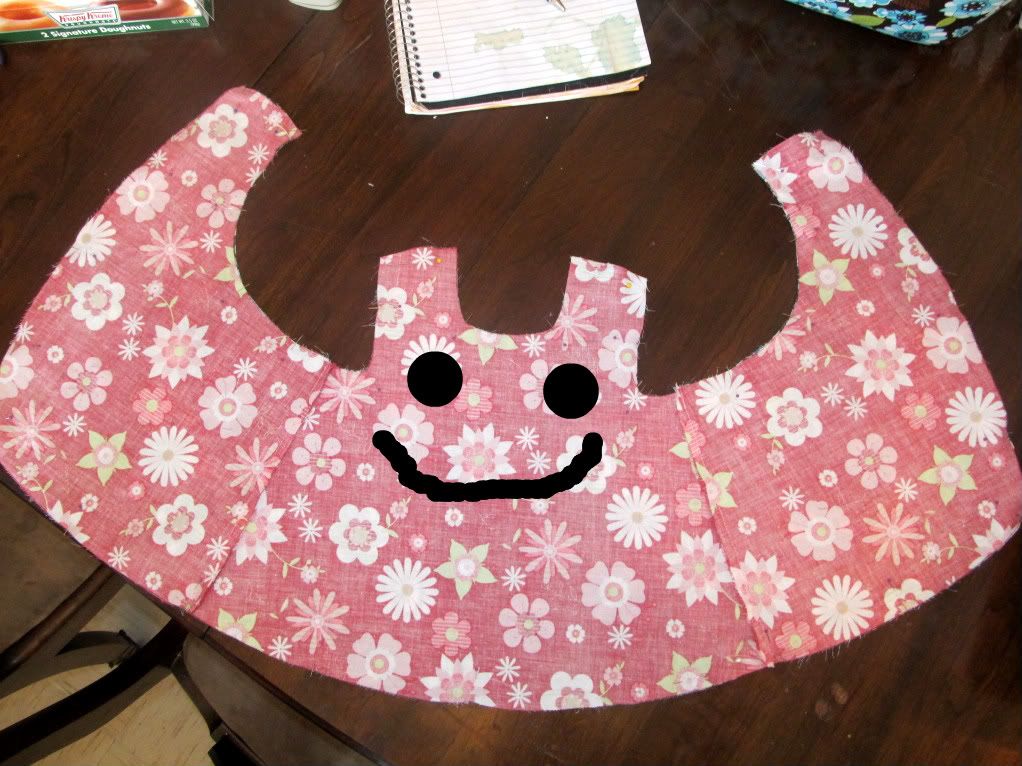
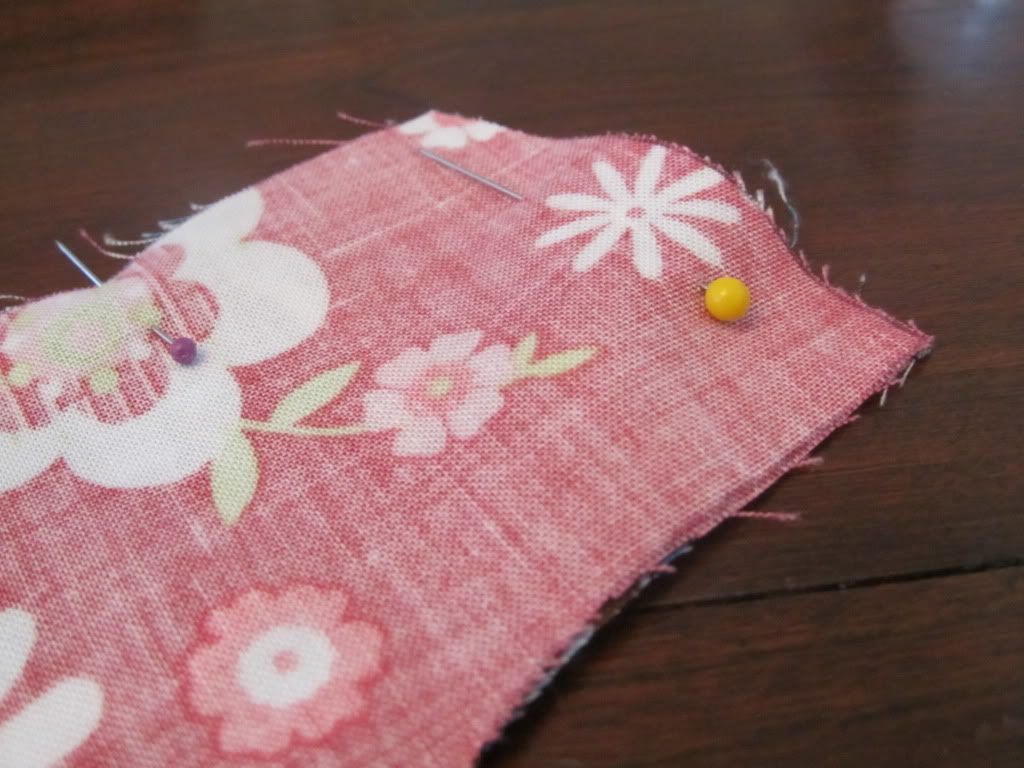
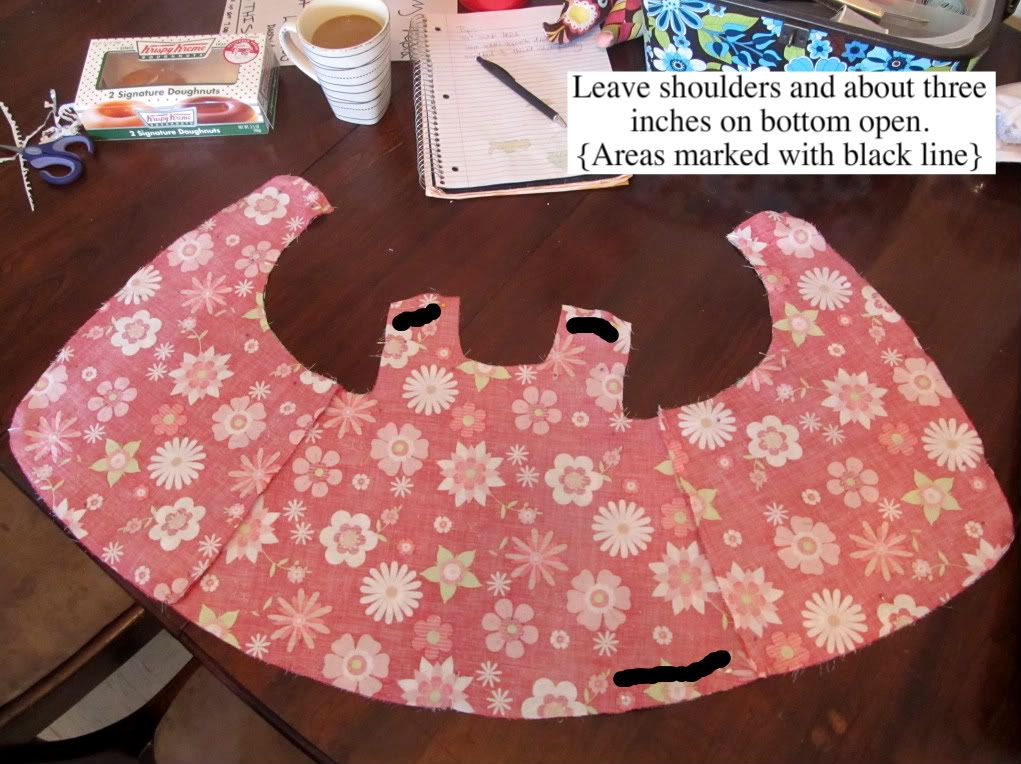
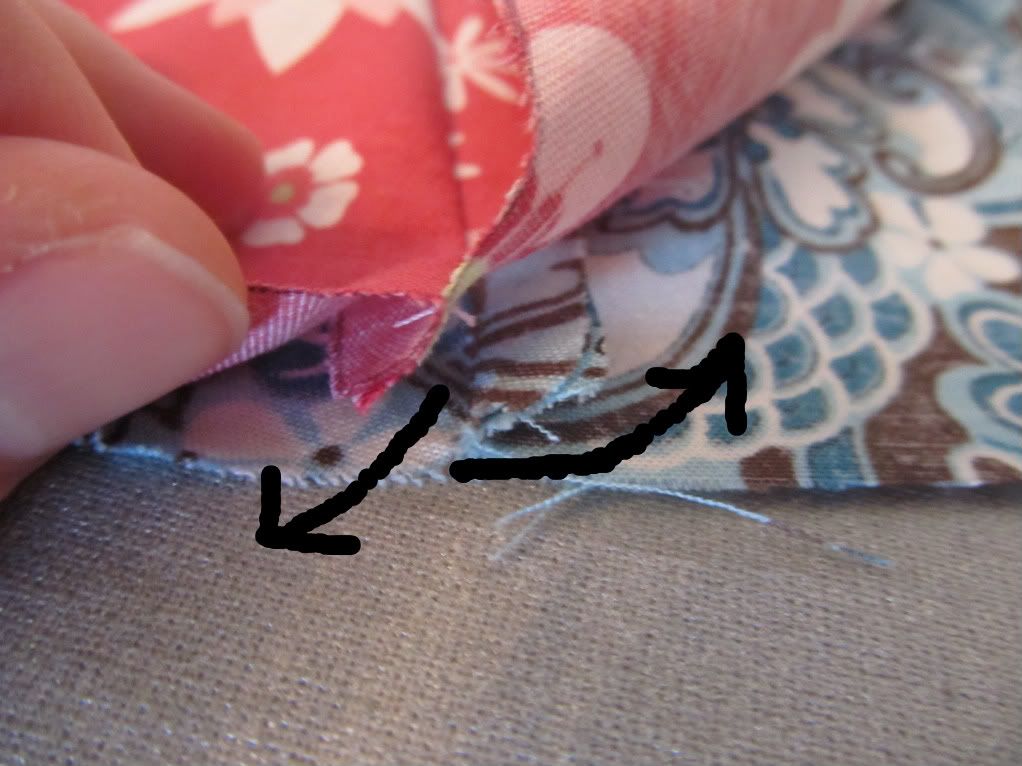
3. Now you should have two pieces that look like happy little bats ;) Pin both pieces together right sides facing each other. I start by lining up & pinning each corner, then the seams, then the shoulder pieces and center of curves on the straps. After that I pin between those to keep it all lined up. At the shoulder strap and about three inch space at the bottom I put larger pins sideways to remind myself not to sew there. You want these spaces {marked with a black line} left open for turning later.
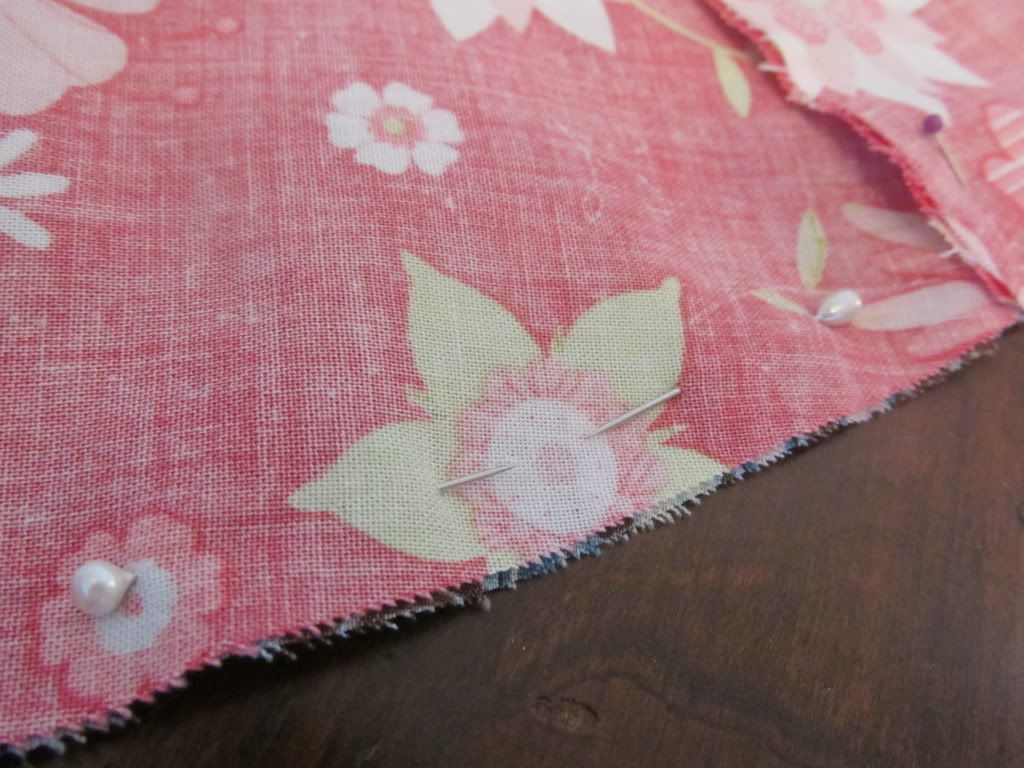
*Quick Tip! If one thread won't coordinate with both fabrics use one color thread and another color in the bobbin and pin accordingly so the top fabric matches the top thread and the bottom matches the bobbin.
*Quick Tip! If one thread won't coordinate with both fabrics use one color thread and another color in the bobbin and pin accordingly so the top fabric matches the top thread and the bottom matches the bobbin.
4. Now it's all sewn together and pins are removed it's time to trim up a couple seams and turn right side out. I like to trim the neck and curves on the inside of straps {B&C}. If you don't trim the seam you'll want to make small cuts {careful not to cut your seam!} at the curves. Either options gives less bulk after it's turned and I think a nicer finish. To turn simply reach in at the bottom and start pulling the fabric out. I like to use a chop stick {they come in some bags of stuffing also} to really push out the corners and curves.
5. Press! I know, again. But it really is necessary this time! Another trick to a more finished product is top-stitching. To get a good top-stitch you want to iron the piece flat, pushing out the seams. Also when you do this tuck in the bottom that you left open for turning about 1/4" so it's lined up with the rest of the piece. Don't top stitch the open end of the shoulders!
*Quick Tip! I like about 1/8" seam when I top stitch. To get this I center the edge of my fabric under the right part of my presser foot and move the needle to the right. This helps me keep a straight line. {Though I'm still practicing improving this} Your sewing machine should have a setting for this. If it doesn't then line up the fabric accordingly to the needle.
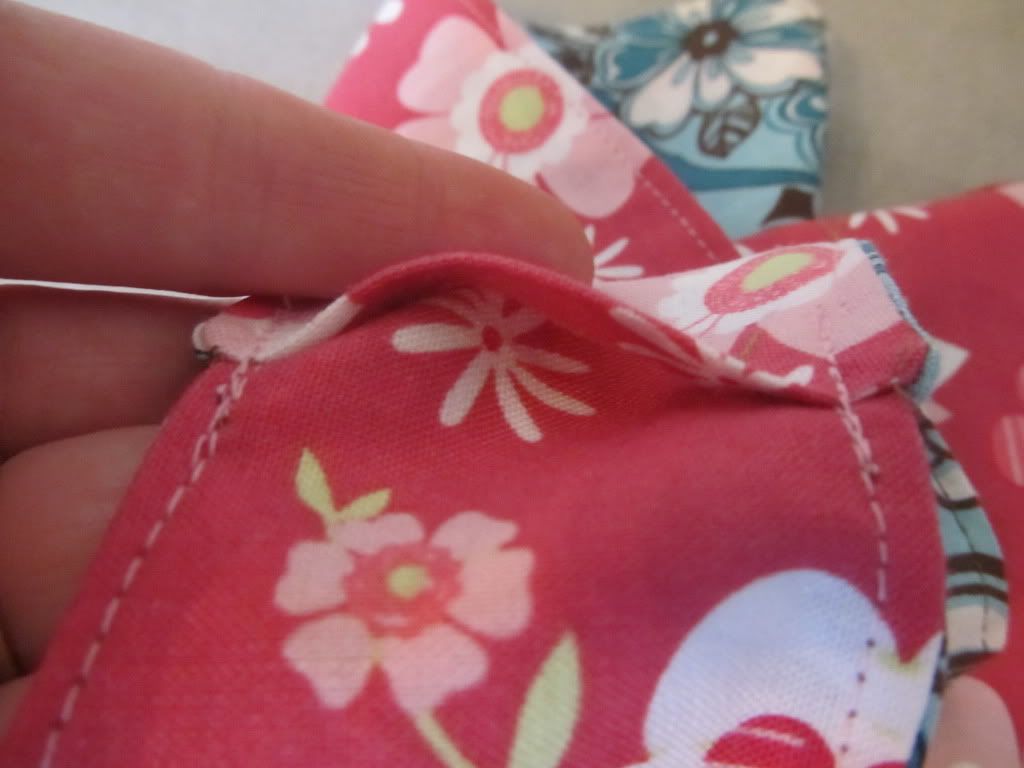
6. Now it's time to assemble the straps. My pictures are going to be opposite of what I tell you to do. I wanted to open the neck a little and doing so trimmed the shoulder piece but forgot to trim the strap piece to match so I had to tuck the shoulder into the strap instead of the strap into the shoulder. And your pieces will be the same size. Either way ends up working.
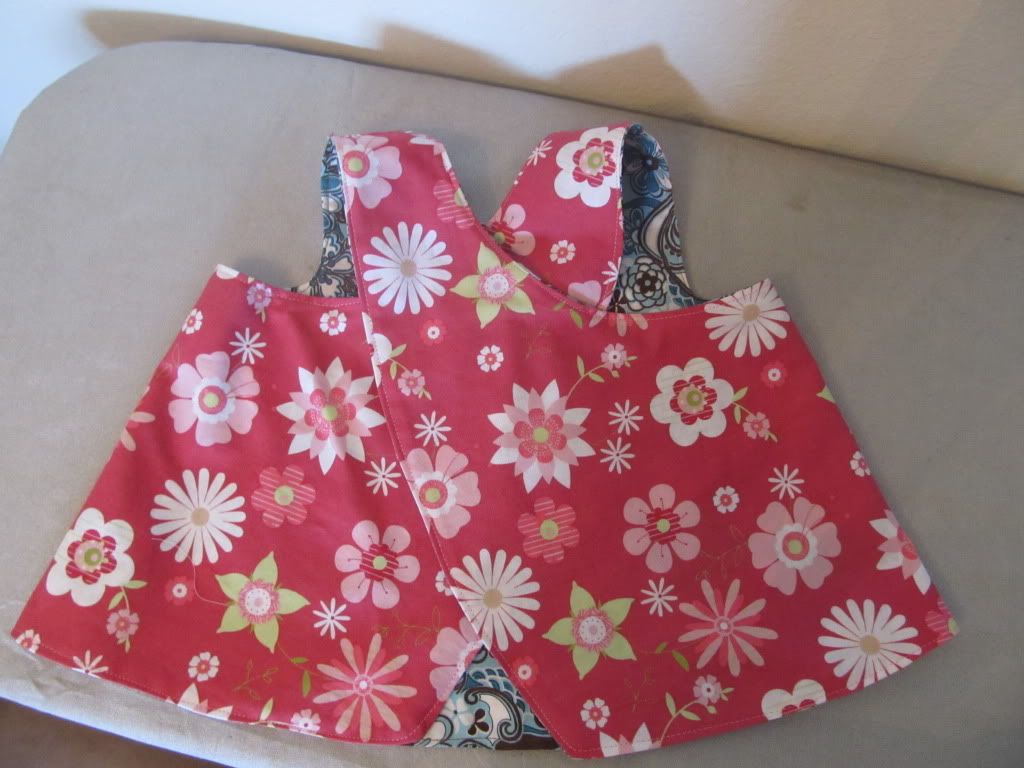
Tuck the shoulder about 1/4" in and press, then tuck the strap in about 1/2" and pin together. Remember, the back pieces cross over each other. Sew together lining up your stitch with the existing top-stitch. I back track a couple times. You'll have an opening that you want to sew up as well.
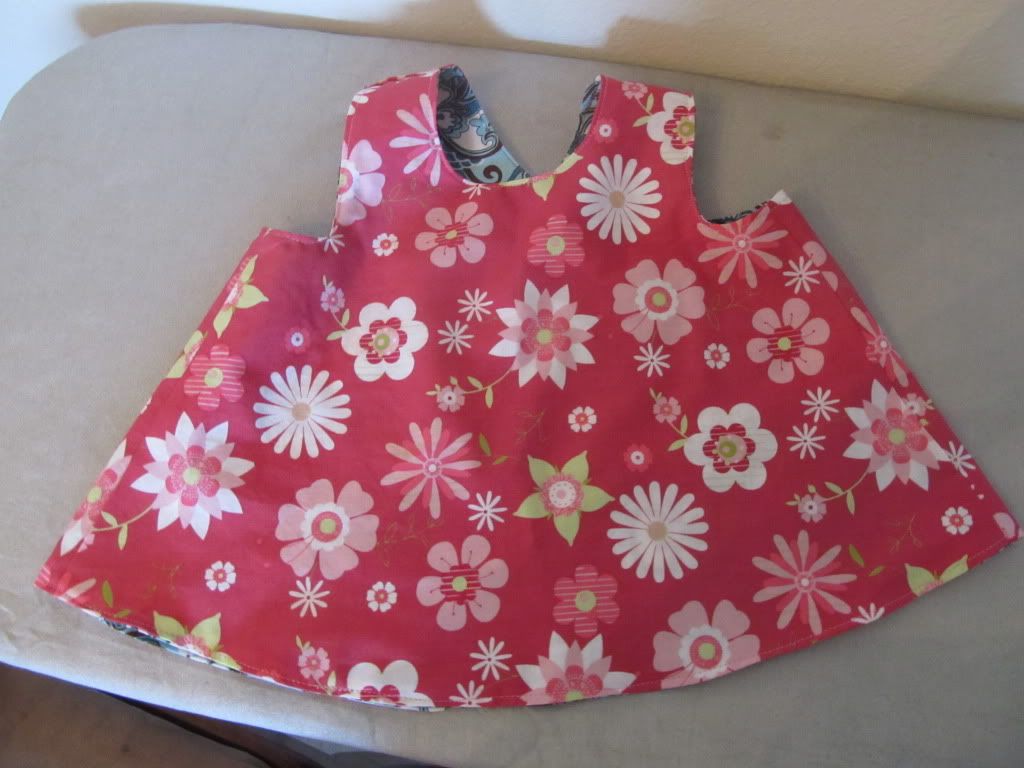
7. Admire your finished product and get it on a cute little girl. Or boy if you must test it out. Just remember to take a picture for the baby book. ;)
7. Admire your finished product and get it on a cute little girl. Or boy if you must test it out. Just remember to take a picture for the baby book. ;)
And you may want to go get more fabrics because these are just too simple and cute. I have seem variations with ruffles added across the bottom, between the fabrics, added flowers or buttons, you could embellish with ribbon or ric rac as well. I have also seen some with the straps finished and tied off {though they may need to be longer to do that}. You could also make the neck square instead of rounded.
I hope this tutorial is helpful! If you do make a pinafore using these directions I'd appreciate any feedback and would love to see your finished products!
Note: I'm not adding my "Searching Out Simple" mark on most of these photos so you can see the whole thing clearly but please don't use my pictures as your work or without giving credit. The tutorial I used to make my first pinafore is inspiration for this post but I have added more tips and all pictures are mine.
Thanks for visiting!
Linking to:


LOVE the fabrics on this! She looks so pretty in it :) Great tutorial too, the writing on the pics is awesome :)
ReplyDeleteThat is just adorable! Love your little Model, she is too cute! :)
ReplyDeleteThis reverse pinafore is just gorgeous. I'm going to make one for a friend's almost-1-year-old!!
ReplyDeleteThank you for sharing this tutorial! It seems quite easy and I might give it a try later this week! I'm not used to sew dresses but hopefully I can manage anyway.
ReplyDeleteI'm a new follower and are looking forward to next blogpost!
/Mari
http://neomasfrestelser.blogspot.com/
She's sooo cuteeeee, love the dress you made for her, the fabrics are so cute! i'm your newest follower :)
ReplyDeleteI hopped from TypeAdecorating bloggers Party :)
Susan at http://tea-diary.blogspot.com
Thank you for sharing! I will have to try this, my daughter loves to run around in lightweight clothes with her fluff booty hanging out. ;)
ReplyDeleteDarling dresses and adorable little girl!!!
ReplyDeleteNew follower. :)
OH my! she is the cutest thing.. Great job on your tutorial! Thank you so much for your sweet comment on my white shirt, and thank you for visiting.. Have a wonderful Wednesday. Hugs, Anne
ReplyDeleteI'm impressed on how beautiful it turned out! Great job! Really appreciate you linking this up at the Creative Bloggers' Party & Hop. PS: She is sooo adorably cute :)
ReplyDeleteI love this. Now I just need ot have another little baby girl, so I can make it. Too cute! Oh and your about me section is awesome. I too feel just like you. A mom who is just trying to be the best and learning along the way. I am so glad to have found your blog:>
ReplyDeleteThank you for the sweet compliments. :)
ReplyDeleteThis is a darling little project! So cute and well done! I don't really sew, but it looks like a super tutorial to me! =)
ReplyDeleteI love the fabrics and your daughter is the cutest little peanut!
~ Mara @ Super Savings
I made one for my almost 4 motnh old today using one of her dresses as a guide. It is huge!! I don't know what I did wrong. Is it supposed to be big, especially in the back, or should it be more snug?
ReplyDeleteHi Corie, I couldn't reply to your e-mail so I hope you see this. The pinafores I have made were more loose than snug. How much of a seam allowance did you give yourself when tracing? Did you use the same measurement when you sewed it?
ReplyDeleteplease, why don't you scan your pattern so we can download it and have a nice one to work on ^_^
ReplyDeleteI'd love to make one to my girl, but now she's two and 5 months
this is wonderful! Thank you! I'm so excited because I'm new to sewing and I never new how to get the 1/4", 1/2" seams every pattern always talks about. I thought you had to guess or measure it out. :P
ReplyDelete